

If you're an avid PC gamer, then you're probably well familiar with the term overclocking, which is basically just tweaking your computer hardware to run faster than it was originally intended.
Why would you want to do that?
Let's say the processor in your PC is listed as 2.2 GHz. You could tweak the settings in the BIOS and bam—you're PC now runs at 2.9 GHz, faster with even better performance. For a gamer, speed and performance are must-haves to winning.
And you know what? Overclocking isn't just for computers.
A few curious Androiders over in our Nexus 7 SoftModder forum have been discussing the possibilities of overclocking their tablets. So, in this article, I'll show you how to overclock your Nexus 7 (running Jelly Bean 4.2.2) from 1 GHz to 1.6 GHz and reap the benefits of blazing fast speed and performance!

Games will feel smoother, apps will launch faster, and that Android lag will disappear!
- Speed Note: Not all Nexus 7s are made the same. Some can be easily overclocked to 1.6 GHz and maybe even a bit more, while some only slightly. Your mileage may vary.
- Battery Note: You'll be pushing your Nexus 7 to run faster than it was intended, so your battery life will be lower.
- Heat Note: Faster speed means a hotter running Nexus 7; this is to be expected.
So, if all of the above is okay with you, let's get started!
Before You Start Overclocking
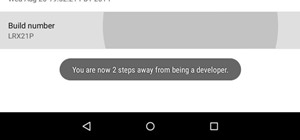
You'll need to be rooted with a custom recovery installed. If you're not there yet, make sure to head on over to my definitive guide to softmodding your Nexus 7 tablet to root and install a custom recovery tool, then proceed below.
Step 1: Download the Motley Kernel
On your Nexus 7 tablet, download the Motley kernel using this link (UPDATED LINK!).
What is a kernel? It controls the operations between your tablet and the OS.
Step 2: Install the Motley Kernel
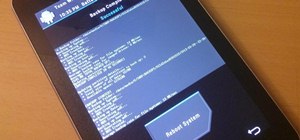
Boot into your custom recovery of choice (in my case, TWRP) by powering by off your Nexus 7 and then pressing both the volume down and power button at the same time. Then simply...
- Tap Install.
- Browse for the .zip file you just downloaded.
- Tap on it and Swipe to Confirm Flash.
- Reboot.
Step 3: Install BusyBox and TricksterMOD
The kernel should be installed now, but you'll still be running at stock speed. In order to unleash the full power of your Nexus 7, you'll have to download a couple apps from the Google Play.
On your Nexus 7, download both BusyBox and Trickster MOD. They're both free, so don't worry.

- BusyBox is a very complicated app, but to simplify it for you, it allows your tablet to do more complex kernel functions running in the background.
- Trickster MOD allows you to tweak your CPU and GPU (graphics) speed. This will allow you to overclock your Nexus 7!
Step 4: Set Up BusyBox
Launch BusyBox and tap Install at the bottom.
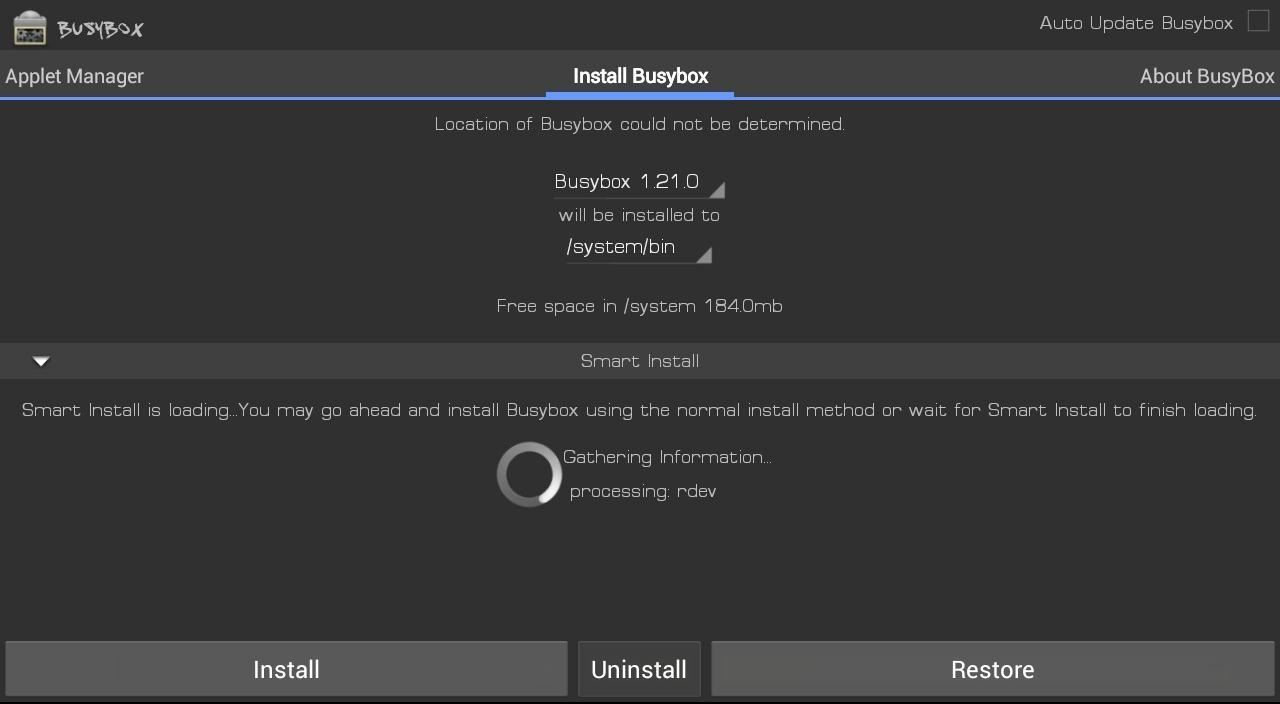
That's it for BusyBox. Now, let's start overclocking!
Step 5: Overclock with Trickster MOD
Launch the Trickster MOD app and tap the Specific tab and change the GPU Max Frequency from 446 to 520. Tap the check icon in the top right to save these settings.
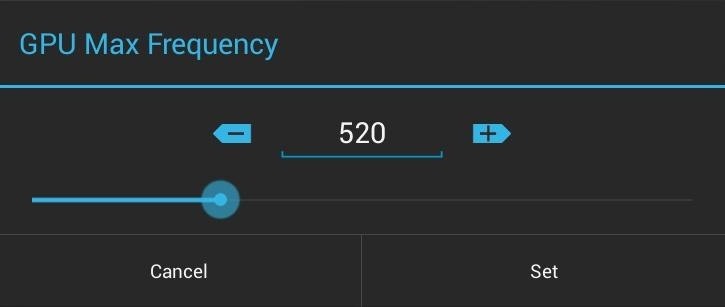
We just overclocked the GPU! Now we'll overclock the CPU.
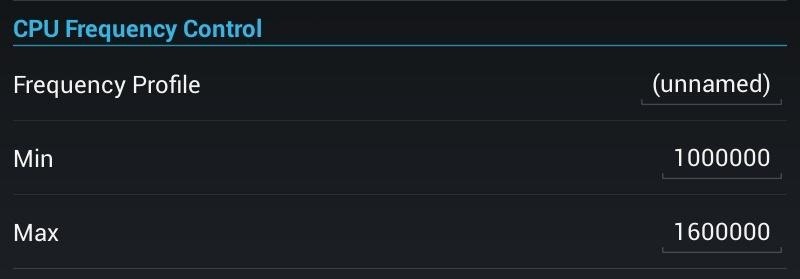
Go to the General tab and find CPU Frequency Control and change the default settings to Min: 1000000 and Max: 1600000. Tap the check at the top right to save these settings.
We'll want these settings to be automatically applied every time you boot up your Nexus 7, so head over to the top right again and choose Set On Boot and check Enable.
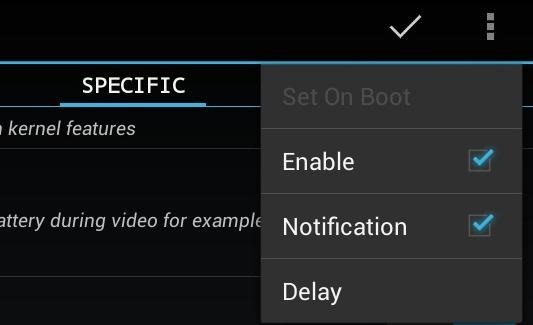
Now just reboot your Nexus 7 and enjoy blazing fast speeds!
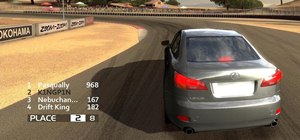
The Difference It Makes
Here's a few benchmarks showing the speed increase in the Nexus 7.
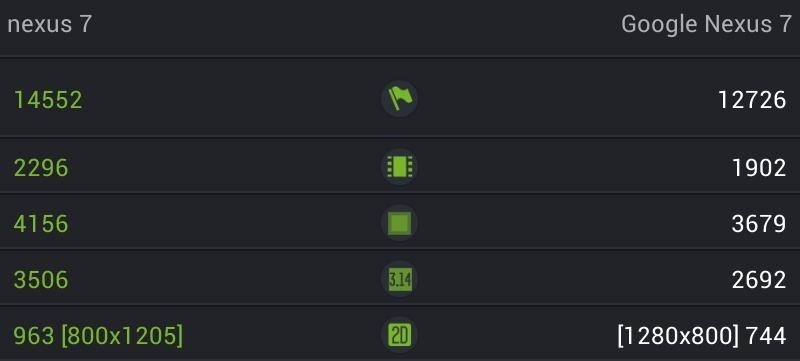
Here, the overclocked Nexus 7 is to the left and the stock speeds on a unmodded Nexus 7 are to the right. The stock one got creamed!
That's it! Give this a try and tell us how fast your Nexus 7 has gotten by overclocking it. If you have any questions, feel free to ask below.
Just updated your iPhone? You'll find new emoji, enhanced security, podcast transcripts, Apple Cash virtual numbers, and other useful features. There are even new additions hidden within Safari. Find out what's new and changed on your iPhone with the iOS 17.4 update.


32 Comments
can I uninstall tat motley any kernal-nexus7 -246.zip
file again
To uninstall it, you would just flash the stock kernel. Do you need a link to it?
What would the link be to flash the stock kernel to get rid of the over clock and kernel
is this safe to my nexus? are there possibilities that it may fail and result to unwanted issues?
This is safe. It's been tested and revised a number of times. If anything, this can all be undone if desired.
I can't find GPU max frecuency ,only mpu voltage and CPU control please help :(
Can you please tell us where we can find GPU max frequency?
Click the tab for Specific. It's located at the top of TricksterMOD.
Dude I really don't know which version TricksterMOD you're running. I've just got the app from play store and your guide is just not correct. GPU max frequency is not located at the top in the tab for Specifik.
I'll look into this. I definitely see it on my Nexus 7.
For anyone not seeing the setting for GPU in Specific, you should be running Android 4.2.2 before flashing the kernel.
Well I have the same problem! I am on 4.2.2 and no GPU max frequency... Are you sure the GPU options is included in this kernel?
I'm looking into the issue and I believe it lies in the hardware difference between some Nexus 7s. As I mentioned before, not all Nexus 7s are built with the exact same hardware, but they maintain the same technical specs. Thus, certain chips in certain Nexus 7s may not offer the GPU max frequency option at all.
For now, just alter the CPU option because your Nexus 7 will still end up faster than stock.
I think the link is to the wrong version of the Motley.
Try the latest one here.
There is no GPU max frequency option, I'm also on 4.2.2
Hey everyone! This has been fixed. I updated the download link for the ZIP file. Re-flash and you'll DEFINITELY get the GPU settings to show. :-D
it's now there Danny, apparently your first link was bad.... thanks man... ^^
Hey im new in this whole modding thing. here's a few question.
1- is Cyanogen mod and TWRP the same class? imean, if you already flashed cyanogen, do i also need TWRP to tweak?
2-I rooted my N7, but without flashing custom rom. no TWRP either. can i still overclock it?
3- you said overclocking eats up battery. how can i easily switch back and back again between "performance mode" and "battery saving mode"? i might need it during travelling.
Thanks.
Yes Thanks Build 249 work fine.
So I just installed this from the updated link today and Trickster doesn't show GPU settings. It shows Smart Dimmer, FSYNC, GPU 3D Scaling, Max active CPU cores, ZRAM, MPU voltages, but the GPU section is completely missing.
Edit:
The kernel I installed from your updated link is #246. I checked XDA and the most recent kernel is #249 (which corrects the GPU issue)
You may want to verify the link as it didn't give me the right version. This is where I found the updated Kernel.
This has been fixed.
What's the default min/Max for cpu
Hi Danny, do you think it will be OK to leave the min CPU frequency set to the default and just up the max frequency? All I'm thinking is that it will save battery when when just browsing etc, but still have the option to go to 1.6 as and when needed ie when gaming ( real racing 3 ).
PS thanks for your guide here and the one on how to root my nexus, everything worked perfectly :-)
Yep, leaving the minimum CPU frequency as default is fine.
Thanks Danny keep up the good work :-)
I am wondering if anyone has run into this. After following the steps I started to get red video artifacts. I restored everything back to factory and starting again checking for the artifacts at each step. I discovered that they start right after I change the kernel to the motley_anykernel_N7_build_249 any suggestions? Anyone else see this? Where can I find just the Kernel to restore rather than starting from factory again?
Update: Tried the trinity 7 kernel, no artifacts. Went back to motley and artifacts are back.
Hey danny can i install the franco kernel in order to replace the motley one
Will this work for android 4.4? Please respond ASAP.
The kernel hasn't been updated to Android 4.4 yet. There are other custom Kitkat kernels for the Nexus 7, however. If you have a Nexus 7 2nd generation, the ElementalX kernel is a great one for overclocking and has a great, easy to use installer.
Get it here -
http://forum.xda-developers.com/showthread.php?t=2389022
cant set gpu max frequency past 400..... followed all steps exactly dont know what to do
Hi, I'm pretty interested to start overclocking but I'm using MultiROM with CM11 4.4.2 nightly and TWRP. MultiROM made edits to my kernel. So, would flashing this kernel make me lose my MultiROM capabilities? If yes, how do I avoid that? I'm booting ubuntu touch, stock 4.4.2, MIUI, and Paranoid Android from a USB Drive using MultiROM.
Dear Danny,
I've tried to install the Kernel into Android 6 (AOSP). After that the tablett can't boot anymore.
Is there a Kernel for Android 6?
tx
Share Your Thoughts