
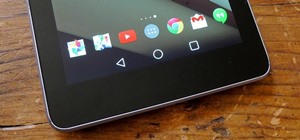
Just because you have a Mac doesn't mean you can't root your Nexus 7 tablet. In fact, rooting Android 4.4 KitKat on both the 2013 and original 2012 N7 models is easy, if not easier than rooting it using a Windows PC.
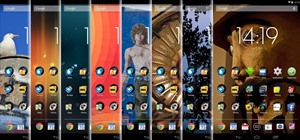
After rooting, you can enjoy many of tomorrow's features today with the help of the Xposed Framework. With it, you can unlock real full-screen mode, tweak out the battery icon, and add countless customizations to make your device one of a kind.
But don't jump ahead yet. Let's get back to rooting!
In this softModder guide, I'll be showing you the easiest way to root your Nexus 7 tablet on a Mac computer. I used a 2013 model, but also verified it with my 2012 model, so it should work no matter which version you have.
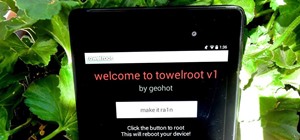
Update: There's a new root method available, and it's the easiest one yet. No need for USB cables, computers, drivers, or toolkits. Simply download an app, run it, and you're root 30 seconds later. Check out our guide here, it's worked flawlessly with 2013 Nexus 7's, and should work for 2012 editions as well. Worst comes to worst, you can always come back to this guide, as that process does not erase any data.
If for some reason you're still running Jelly Bean, check out our previous guide to rooting Jelly Bean on the Nexus 7 for help. If you can't get this way or that way to work on your Mac, you can always use a friend's PC and root the Nexus 7 on Windows.
Step 1: Download the Root Files on Your Mac
Thanks to Anuj Patel, also known as techfanatic9, all the tools we need are easily available at our disposal from his website, Androidrootz. The process is nearly identical for both the 2012 and 2013 versions of the device, just make sure you grab the appropriate files.
Make a new folder on your desktop titled Nexus 7 Root, or something like that, so the files we download can be easily located.
For the 2013 Nexus 7 Tablet
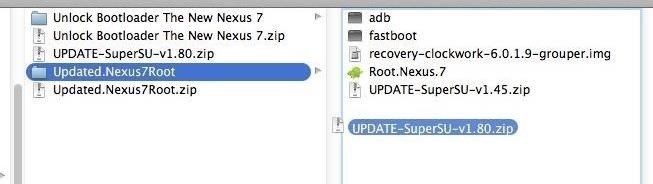
Download the One-Click Unlock Bootloader Toolkit and 2013 Nexus 7 RootKit. After downloading, unzip the files and place them in the folder you created on your desktop.
For the 2012 Nexus 7 Tablet
You will need the One-Click Unlock Bootloader Toolkit and the 2012 Nexus 7 Root Toolkit. After downloading, unzip the files and place them in the folder you created on your desktop. You will also need to replace the SuperSU zip file inside the toolkit folder with the updated version provided below—just don't unzip this file.
- One-Click Unlock Bootloader Toolkit .zip (mirror)
- 2012 Nexus 7 Root Toolkit .zip (mirror)
- Updated SuperSU V.1.80 .zip (do not unzip) (mirror)
Step 2: Make a Back Up of Your Nexus 7
This process will wipe your device. Unfortunately, unlike the Windows method, this toolkit does not include a backup option. Alternatively, you can check out our softModder guide on backing up your Nexus 7 without root or a custom recovery to prep for the next step.
Step 3: Enable USB Debugging on the Nexus 7
Your Mac needs to make a connection to your device, so you'll need to enable USB Debugging on your Nexus 7 to do so. Just go into Settings -> Developer Options -> USB Debugging.
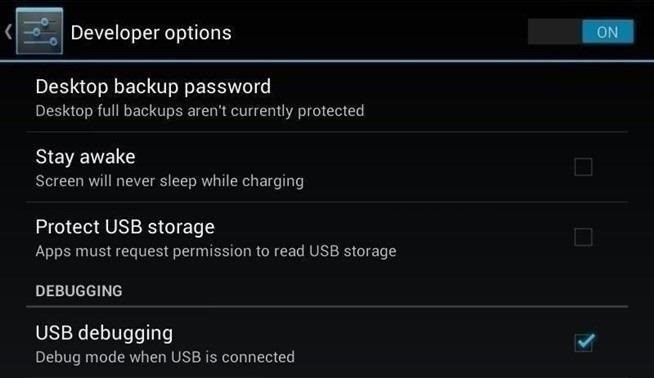
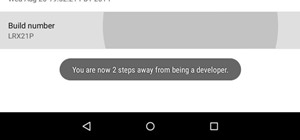
Don't worry if you don't see Developer Options. You can unlock it by going into Settings -> About Device and tapping on Build Number about 7 times. You'll see a toast notification pop up letting you know that you're a developer now.
Step 4: Connect Your Nexus 7 to Your Mac
Now's the time to connect your Nexus 7 to your Mac computer, if you haven't done so already. Do so using your USB cord, and to be safe, make sure all other USB devices are disconnected. And just to be extra safe, use the cable that came with your device, or at the very least, a cable for any recent Android device.
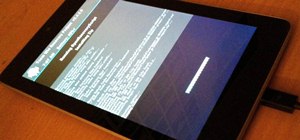
Step 5: Enter Fastboot Mode
To enter Fastboot mode, turn off your Nexus, then hold the Power and Volume Down button at the same time. It should now bring up the bootloader.
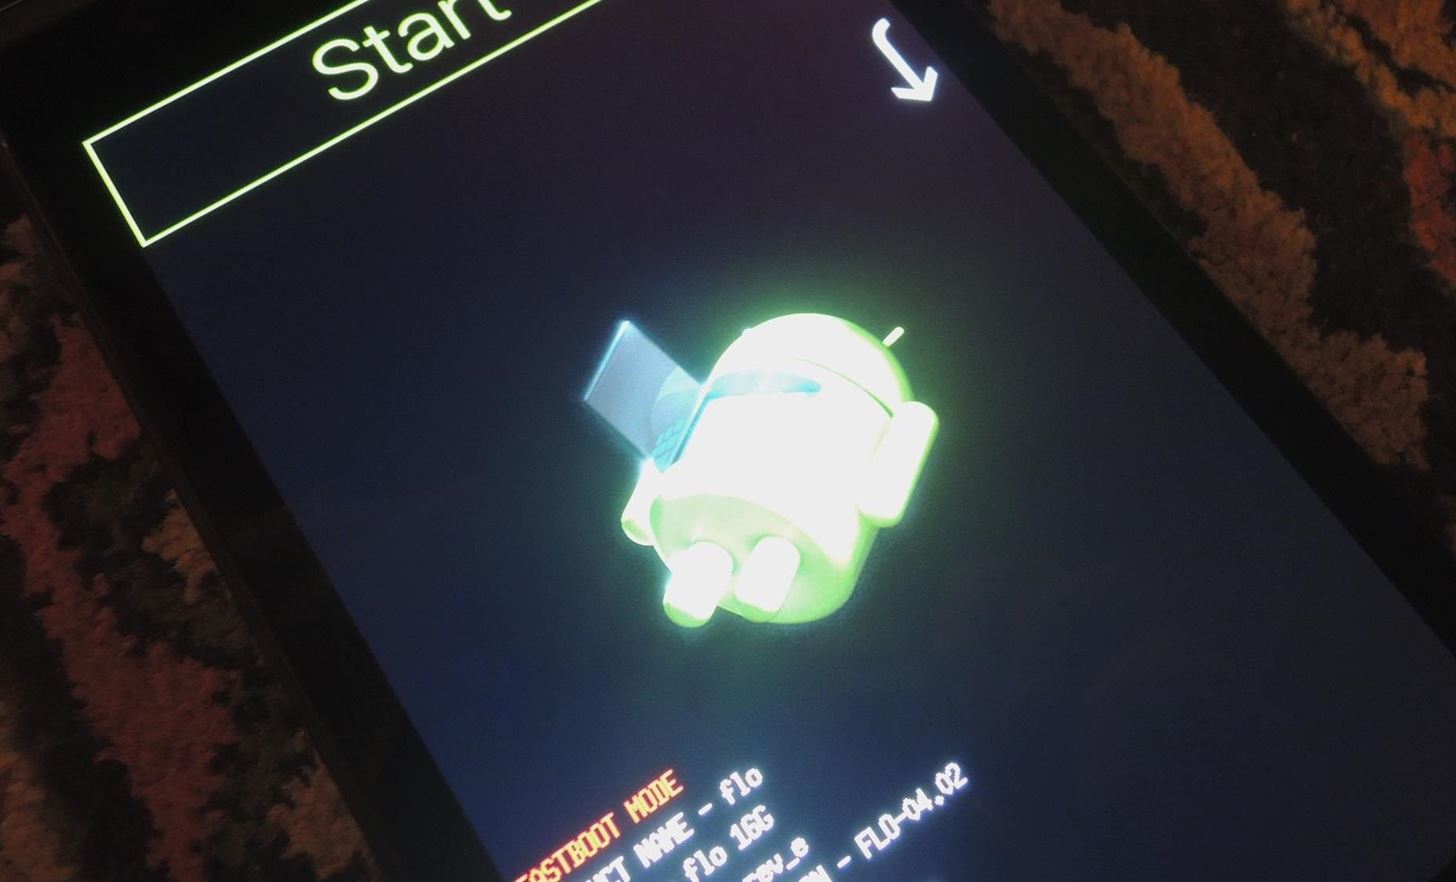
You'll use the Volumes keys to navigate, and the Power button to confirm, but don't worry about those for now.
Step 6: Unlock Your Bootloader
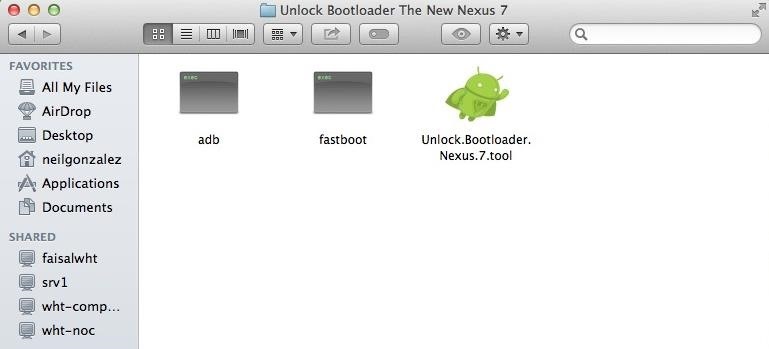
Open the Unlock Bootloader folder (which should be in your new Nexus folder) and click on the green Android icon to start the tool. This will wipe your device, so make sure to back up if you haven't done so already, unless you want to start squeaky clean.
A terminal will pop up with easy to follow instructions. Just press Enter and let the program run its course.
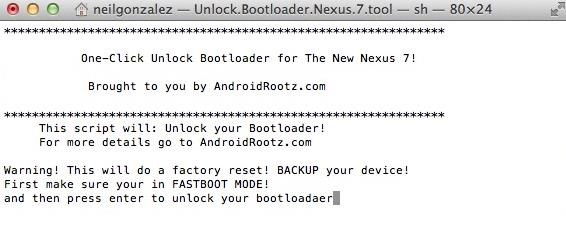
This kit should take care of everything for you, and you should see your Nexus 7 reboot back into Fastboot on its own at some point. When this happens, you should see the "locked" status for the "LOCK STATE" as "unlocked" now. You should also get a confirmation in the terminal window that the bootloader is unlocked.
Step 7: Verify That USB Debugging Is Still Checked
After unlocking the bootloader, use the Volume keys until you see "Start", then hit the Power key to boot the system. Once booted up, make sure USB Debugging is still checked (see Step 3 above).
Reboot back into the bootloader and continue the process below.
Step 8: Run the Root Toolkit
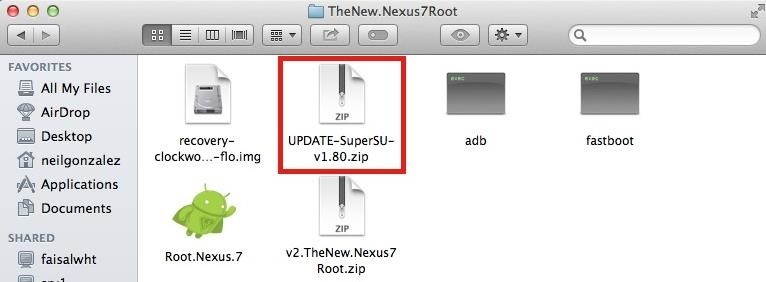
After enabling USB Debugging again, put the device back into fast boot mode. Now, go back into the Nexus folder on your Mac and locate the Nexus Root folder. Open it and inside you'll see another green bot titled Root.Nexus.7 . Run that.

Another terminal will pop up and you'll initiate the root process by pressing Enter.

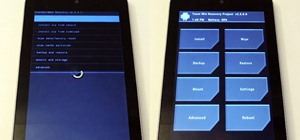
This kit will install a custom recovery, specifically ClockworkMod (CWM), so midway you will see this text in the terminal:
Ready to install CWM
1. CWM (Version 6.0.4.3)
Enter 1 then press enter
Just do as it says—enter 1 and press Enter. This will send CWM over to your Nexus 7 tablet. After it's sent, the toolkit will tell you to install the "SuperSU" file from your new recovery, which we'll do in the next step.
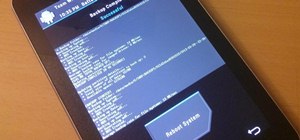
Step 9: Flash SuperSU in Recovery Mode
Use the Volume rockers on the Nexus 7 and scroll until the Recovery mode option appears. Select it using the Power button. Once in your new CWM recovery, you'll need to do exactly what the instructions in the terminal window tell you to do.
- Select Install
- Choose zip from sdcard
- Choose the 0/ directory
- Choose UPDATE-SuperSU-v1.80.zip
- Select Yes
Once it finishes, reboot your Nexus 7 and you'll now be rooted!
What to Do if You Don't See the SuperSU File
In some cases, the Update-SuperSU.zip file may not show up in your custom recovery. Don't panic. You can fix this by using Android File Transfer to call an audible.
Locate the Root.Nexus.7 folder and find the Update-SuperSU file.
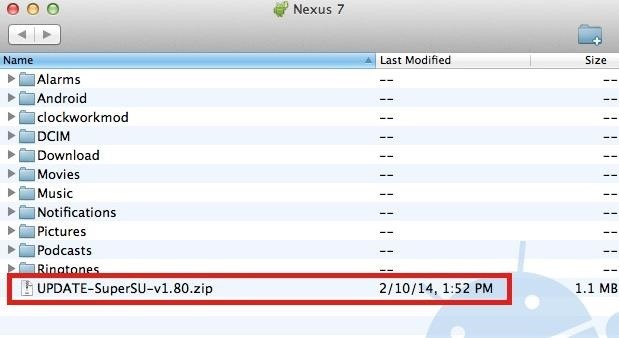
With your device running regularly, connect via USB, and open the Android File Transfer program. Drag the file from your Mac's fodler and place it onto your device.
Go back into Fastboot, select Recovery mode again, and follow the following steps:
- Select Install
- Choose zip from sdcard
- Choose the 0/ directory
- Choose UPDATE-SuperSU-v1.80.zip
- Select Yes
Then reboot.
Step 10: Verify That You're Rooted
An easy way to make sure the toolkit worked and your Nexus 7 is rooted is to download the free Root Checker app from Google Play. Just open the app, select Verify Root, and wait for the results.

Now that you're rooted, what do you do? Like I said before, I'd go install the Xposed Framework, then try out one of the many Xposed mods on your newly liberated Nexus 7 tablet!
Just updated your iPhone? You'll find new emoji, enhanced security, podcast transcripts, Apple Cash virtual numbers, and other useful features. There are even new additions hidden within Safari. Find out what's new and changed on your iPhone with the iOS 17.4 update.


68 Comments
I got to the part where you go into recovery and try in install SU by going into sdcard. however mine says "unable to mount sdcard"
thoughts?
Now I can't get past nexus color loading screen but I can access fast boot and recovery
Can you access the "0/" directory?
no, in CWMR, I am unable to install anything from sdcard because it is unable to mount sdcard.
btw. thanks for your help Faisal
Have you found a solution to get past of the nexus loading screen yet? I'm in the same situation and not finding any solutions.
Is this before or after rooting?
Not fully understanding your question but.... I'm in the exact situation as Kasmo. Went to recovery -> instal zip -> choose zip from sd card. except it says unable to mount sd card. Now my nexus is stuck in the bootloop when trying to boot my Nexus 7 up. I'm getting soooo stressed :S
Try this: Go in to recovery and select "Wipe", wipe "data" and reboot. That should get you past the "X" boot logo. Now, when you're back up, manually move the "SU" file to your device, reboot into recovery, flash that file, and you should be good to go.
Let me know how it goes.
Don't think I haven't tried that already lol. No matter what I do I will always end up being stuck at the 4 circles booting screen :(
Any more ideas?
Did you have a Nexus 2012? And were you running KitKat?
The guide has been updated, take a look. Make sure that after unlocking the device, you reboot to ensure that "USB Debugging" is still checked.
I hope this helps, please let me know how it goes.
Unfortunately, on my 2012 Nexus 4, I kept on getting the Google text logo with a unlocked lock on the bottom of my screen. After Step 7, I never saw "Ready to install CWM" possibilities.
If I leave the machine, the unlocked screen comes back every so of often. So I wiped my machine twice and want to lock the boot loader again. How can I do that? The machine as been wiped twice and returned to factory preset, but I can't lock the bootloader.
Did you use this guide for the Nexus 4 (the guide is meant for the N7)?
Do you have access to a Windows machine?
This might work for you: Nexus 7 Relock Bootloader ToolKit, though this guide was for the Nexus 7, so that was why your rooting process didn't work. Good luck, and let me know If this helps.
I'm that not comfortable with Terminal, and those instructions make good use of it, so I'm kind of still stuck. I can't get my N7 to engage in Step 8. When I select Recovery Mode, I get the white Google logo with a which unlocked lock and the bottom. Nothing else. I can only do a hard shut down at that point.
Ok, then. If you want to get it functional again then try the Nexus 7 unroot toolkit. This worked for me.
How'd it go?
I used this guide as I have a N7 and a Mac. My mistake. I haven't touched my N4 because I don't want to brick it.
Any suggestions?
I have no access to a Windows machine.
I don't mind totally wiping and resetting it.
You may need to do as Rob Tintworth suggested, down below.
I landed up in the same place - unable to mount sd card and unable to get past spinny colours. I think the issue was that after I unlocked the bootloader, I did not power on the nexus and recheck USB debugging was on. I eventually brought my tablet back to life by downloading the SDK and the factory default image from google and following this guide: http://forums.androidcentral.com/google-nexus-7-2012-rooting-roms-hacks/191477-guide-nexus-7-factory-image-restore.html (but with the 4.4.2 files in the Terminal commands). After restoring it to factory default I was able to root it by double checking USB debugging was on after the bootload unlock.
Please let me know if this works for you.
The guide has been updated, take a look. Make sure that after unlocking the device, you reboot to ensure that "USB Debugging" is still checked.
hi even i was stuck as u mentioned RONNIN and i got past that by wiping data and rebooting the system from there itself
I landed up in the same place - unable to mount sd card and unable to get past spinny colours. I think the issue was that after I unlocked the bootloader, I did not power on the nexus and recheck USB debugging was on. I eventually brought my tablet back to life by downloading the SDK and the factory default image from google and following this guide: http://forums.androidcentral.com/google-nexus-7-2012-rooting-roms-hacks/191477-guide-nexus-7-factory-image-restore.html (but with the 4.4.2 files in the Terminal commands). After restoring it to factory default I was able to root it by double checking USB debugging was on after the bootload unlock.
Thank you for the tip. I guess it's weird that mine didn't require this step, but fortunately you solved it. I'm glad this guide worked for you.
can't seem to get past step 9. it doesnt prompt me to choose any steps Select Install
Choose zip from sdcard
Choose the 0/ directory
Choose UPDATE-SuperSU-v1.80.zip
Select Yes
its just the droid laying back with an attention coming from its chest. plz help
That means the custom recovery was not properly installed. Do you have a 2012 or 2013 model?
2012 nexus 7
Did you follow the 2012 specific details? It's a little different than the 2013 model.
I believe I did, doing everything step for step
Is your bootloader unlocked? hmm, so you may have to try the whole process over or try just installing the custom recovery here with the Custom Recovery ToolKit. But try the process over before using the Custom recovery link I provided.
I actually did it with the 2012 model as well, so no fear
Im gonna run the custom recov kit u just provided..
sounds good. Keep me updated
I locked it, unlocked it ran the root kit..launch recovery mode..now its stuck on the google logo for past 5mins
How'd it go?
Please help! I am attempting to root my Nexus 7 (2012) tablet. Downloaded the apps & drivers (above) & was able to successfully unlock my tablet. When I ran the root script, the UPDATE-SuperSU zip file did not appear, so I followed the instructions to use Android File Transfer to load the zip file onto my tablet. Went back to fast boot and, (following the script instructions) set the mode to"Recovery" & pressed the Power button.
Now I have a problem - instead of getting the recovery menu, I instead get a screen showing a droid on its side, opened up with an "!" displayed - that's all.... I'm stuck & would sure appreciate some advice.
Update: I went back & reran the entire process (as you recommended above). Everything seemed to have proceeded correctly, however when I run the Root Checker Pro app, I get the message: "Root Access is not properly configured or was not granted" (see attached screen capture for details)
it says "executing this file can grant root access!" - but I am not exactly sure which file & how to execute it....
Gerry Kmack
That's really weird. So basically the custom recovery wasn't there when you went back. Try the process again exactly how you did it, but after place the SU file, don't run the root kit again. Just turn off device, go to fast boot mode, select recovery mode. Let me know how this goes.
I tried re-running the entire process. When I ran the "Root..Nexus.7" app, it flashes
"Pushing UPDATE-SuperSU-v1.45.zip...
error: device not found
error: device not found"
Then it clears the terminal display & says:
"Ready to install ClockworkMod"
Enter 1 then press enter"
Then it displays:
"/Users/gerrykmack/Desktop/Nexus 7 Root/Updated.Nexus7Root/Root.Nexus.7.tool: line 46: : =: unary operator expected
Use the volume keys to highlight Recovery Mode,
Use the power button to select it."
Then it tells me to proceed with the process to select & install the zip file.
bottom line: Root Checker displays the same info (above)
You should have used the SuperSu provided, which is 1.8, not 1.45. If you used the 1.45 zip then that may be where your problem lies.
Thank you & oops I screwed up. The 1.45 zip was in the root app folder - I grabbed it instead of the 1.80 zip file. Once I placed the correct zip file on ,y android & reran the final procedures everything seems to have worked correctly (Root Checker says: "Congratulations! you have Root Access!"
Thanks for all your help! Gerry Kmack
HELL YES! I'm Glad it worked. I rooted on both 2012 & 2013 versions, so I was determined to make this happen. Have fun being rooted!
im having trouble rooting my 2012 nexus 7. its running kitkat 4.4.2. ii have already unlocked the bootloader i have run the root nexus 7 file and i did replace the super SU zip to 1.80 and i even put the file into the device so i could install it and nothing i dont even have superSU on my device i need help D:
Do you have the custom recovery working?
yes i do
Did you use Android File Transfer to place the SuperSU zip in your device?
yup
And when you go back to custom recovery nothing is in there? Sorry, just need to get everything straight.
no there is so i install superSU and when i return to the actual loader i check my app drawer and i dont see superSU and root checker doesnt say its been rooted
Does it give you any notification after installing it
no it doesnt
Im having the exact same issue. brand new 2013 nexus 7 fresh out of the box today. updated to 4.4.2 and then started rooting perthis guide on my mac. installed the 1.8 zip via android file transfer, upon reboot it doe not go i not custom recovery.
Is USB debugging checked off? I may need to root again and see what it is.
yeah I defnitely follwed all the instructions. i ended up doing it today successfully from a pac with the windows instructions. I had to try twice though and ended up needing to factory reset, relock the boot loader, and start over. I think there is an issue with the superuser zip install in the new 1.8
I'm glad it worked, but let me check on that SuperSU
It worked for me, a first timer. Used an iMac running Mavericks (2012 N7). I did receive the "device not found error" until I removed the SuperSU 1.45 from the file itself and placed the new one (1.8) in its place, then all went smooth. I did lose everything and don't understand how to, or if I can, get my N7 back to how it was set up before( Apps, settings etc...)
Thanks
John
UPDATE:
Just used root checker and it says my device is not rooted? What now
Final update. Re did process as suggested, all good now!
Hi! I've followed your guide and I'd download the 2012 related files, I've installeld the custom recovery and when i first installed the super su 1.45 attached in the file. after that, i've checked root access,but i haven't it.
I have followed the hole process, checking after installing custom recovery that i've usb debugging enabled.
then i realize that i don't have the lasted version, so i have installed the 1.80 super su, and then checked again, but nothing yet.
now i've made a factory reset and installed again the 1.80 version trough CWM recovery, and now i turn on usb debugging but seems that the n7 is not recognized by my mac. I don't have root access as well.
please help me!!!
---
I've already fix it.
The Mac root script has a typo. The command should be:
./adb push UPDATE-SuperSU-v1.80.zip /sdcard/
Instead, it's missing a space after .zip:
./adb push UPDATE-SuperSU-v1.80.zip/sdcard/
The whole sequence is/should be:
./adb push UPDATE-SuperSU-v1.80.zip /sdcard/
./adb reboot bootloader
./fastboot flash recovery recovery-clockwork-6.0.4.3-flo.img
Sorry, I need help. Computers can't recognize my N7. I've tried: mac, windows xp, windows 7. using different cables, different ports. I've tried different apps like android file transfer and so on. I've tried different combinations of mtp, ptp, and usb debugging (because i heard it worked for some ppl). I've even tried going into windows device managers deleting and reinstalling android drivers. nothing... nothing recognizes my N7, but it charges my N7, so I got that going for me, which is nice.
I assume you have USB debugging enabled...
Yes sir. What tipped me off that my mac wasn't recognizing my N7, was when I got everything ready and ran the unlock boot loader program; the program kept telling me that it was waiting for device.
hi i tried to root my N7 i unlocked the bootloader, and then in recovery mode i couldn't see the "Update-SuperSU.zip" i used the android file transfer as you said but when i tried to go in recovery mode it shows the android logo on its back with a red triangle with an exclamation mark on its belly. how do i fix this???
I followed all the steps but i cant go past nexus color loading page
pls help
Ronnin Padilla I hv same problem as u did, how did u solve it?
What kind of Nexus do you have?
having a complete nightmare and hoping someone is still looking a this post, whatever i do I end up with the droid and red exclamation mark when trying to write the supersu and it comes up 'installation aborted' advice please
Can you still boot up your device?
I've run the whole process twice. First time I thought I had USB debugging checked, but apparently didn't. Got the Droid with exclamation in his chest. Reran the whole process and everything appeared to go smoothly . bootloader is definitely unlocked, cwm is functioning properly, but no root access when running root checker. Apps/Data on nexus was never wiped. Everything just as it was before doing anything. Any ideas? Thanks!
I can't find the 1.8 .zip file. when I download it the is no zipped file in it. I'm lost!! There are files within the file labeled arm, common, META-INF, & X86. I didn't unzip or uncompress anything, thats the way the folder downloads
Help?????? please!!!!!!
Share Your Thoughts