When people first learn that their Android device is capable of dual-booting different operating systems, e.g. Linux, they almost universally respond with, "That's so cool." And for those of us ambitious enough to actually try one out, we are typically filled with glee as we see Ubuntu, or something similar, boot up for the first time on our tablet or phone.
We play around, download some cool new apps, and brag to our iPhone-toting friends... but eventually, we revert back to Android and never boot into Linux again. At the end of the day, it is either too slow or is not easy enough to navigate on our touchscreen to be used regularly.
Enter Bodhi Linux
Bodhi is a lightweight Linux distribution that uses the Enlightenment Desktop (as opposed to more common desktop environments like Gnome, KDE, or Unity), which works well on smaller, touch-enabled screens, while still managing to be both responsive and pretty. Bodhi is based on the wildly popular Ubuntu and has very low minimum system requirements, meaning that it runs smoothly on less powerful hardware.
But enough with the history lesson, here's how to try out Bodhi on your Nexus 7 for yourself.
Prerequisites
Before attempting to do this, you'll need both of the following:
Download the Bodhi Installer
While it is possible to download the ARM compatible version of Bodhi and flash it directly to your device via fastboot, most users would prefer to use their MultiROM Manager to dual boot Bodhi alongside the original Android OS.
Download the Bodhi MultiROM Installer to the root of your device's SD card, or to your computer and copy it over via USB cable.
Install Bodhi Linux
Bodhi does not install in the same way that most multiboot ROMs do. Instead of adding Bodhi to the MultiROM Manager, you install it just as you would a normal ROM in your recovery. In this case, I'll be using TWRP, but the process will be similar for others.
From your recovery, tap Install and select the Bodhi installer that you downloaded in Step 1. Make sure that the Inject MultiROM after installation box is checked, then swipe to proceed.
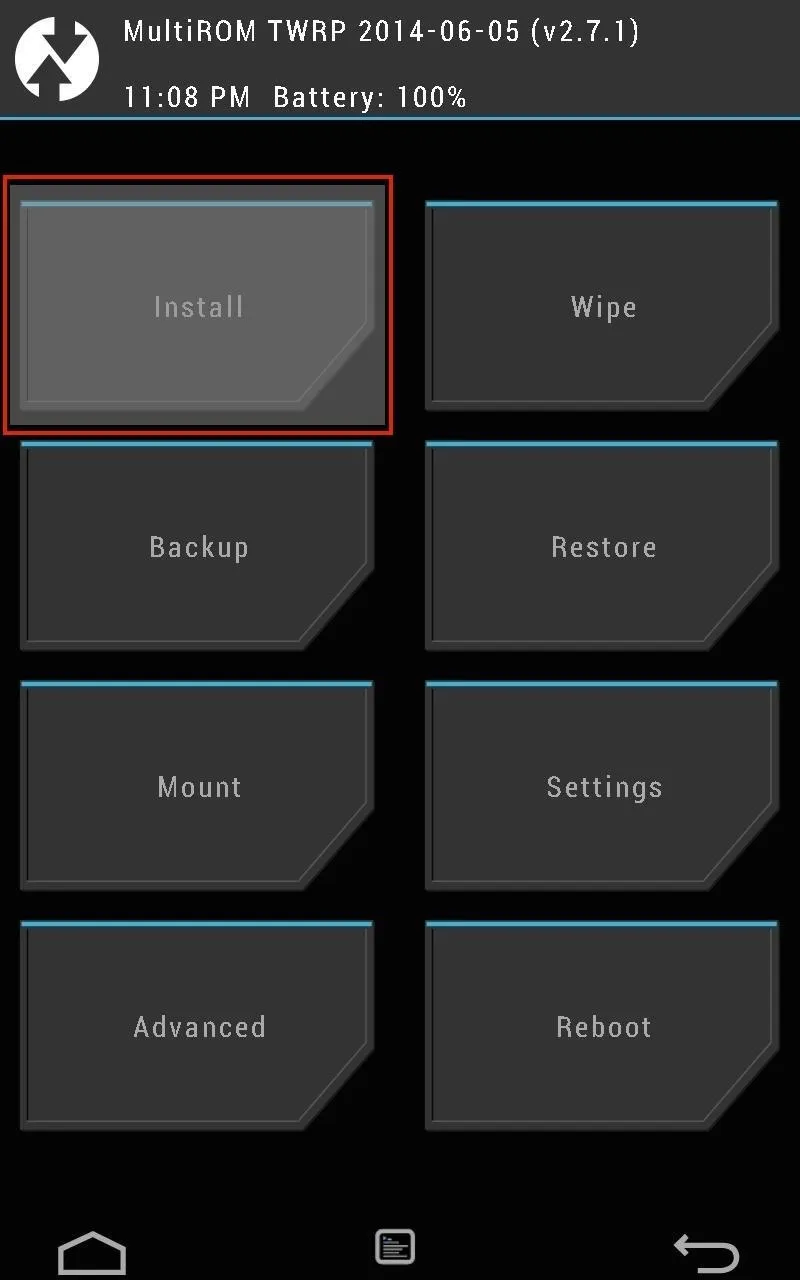
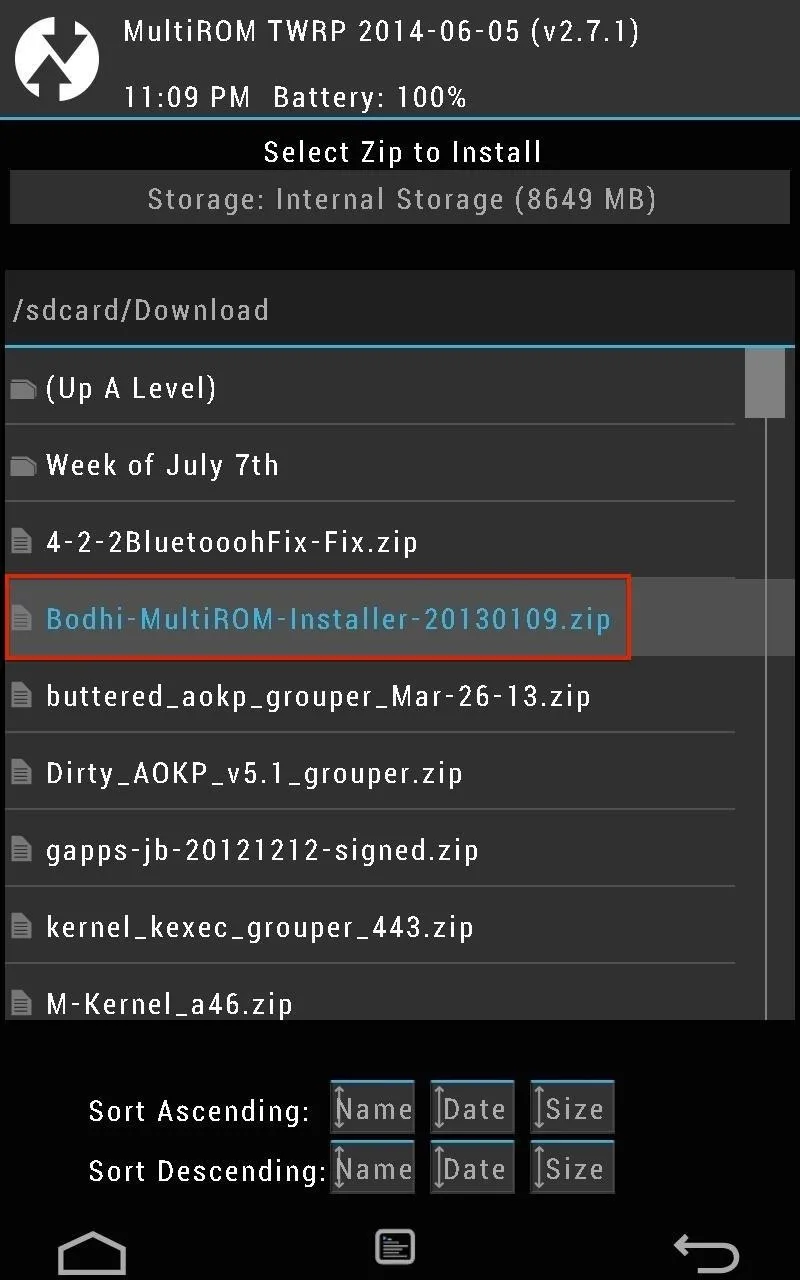
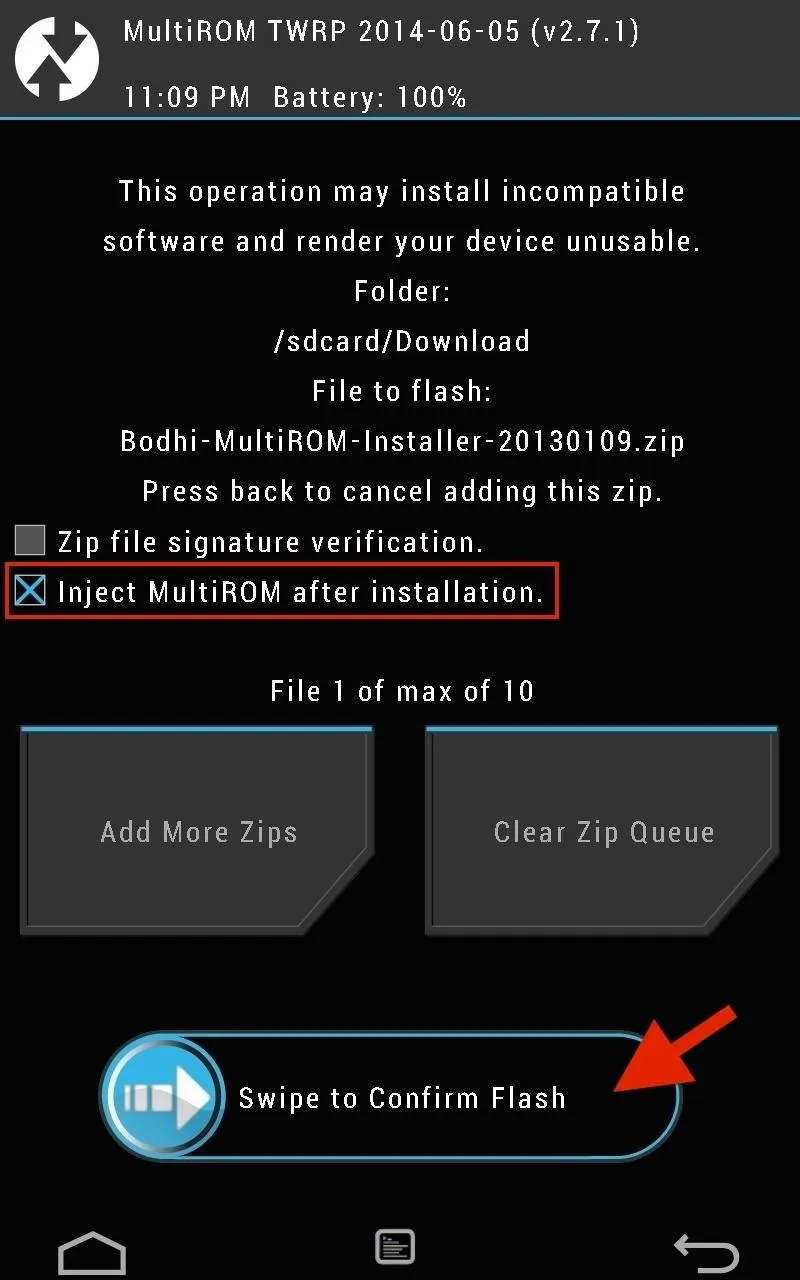


Don't worry, you are not overwriting your currently installed OS. The Bodhi installer puts its files in a separate partition that MultiROM will automatically detect.
Note that you do not need to tap the Multiboot - Inject Curr. Boot Sector button that shows up after you have installed Bodhi; this was already done by the installer.
Boot into Bodhi Linux
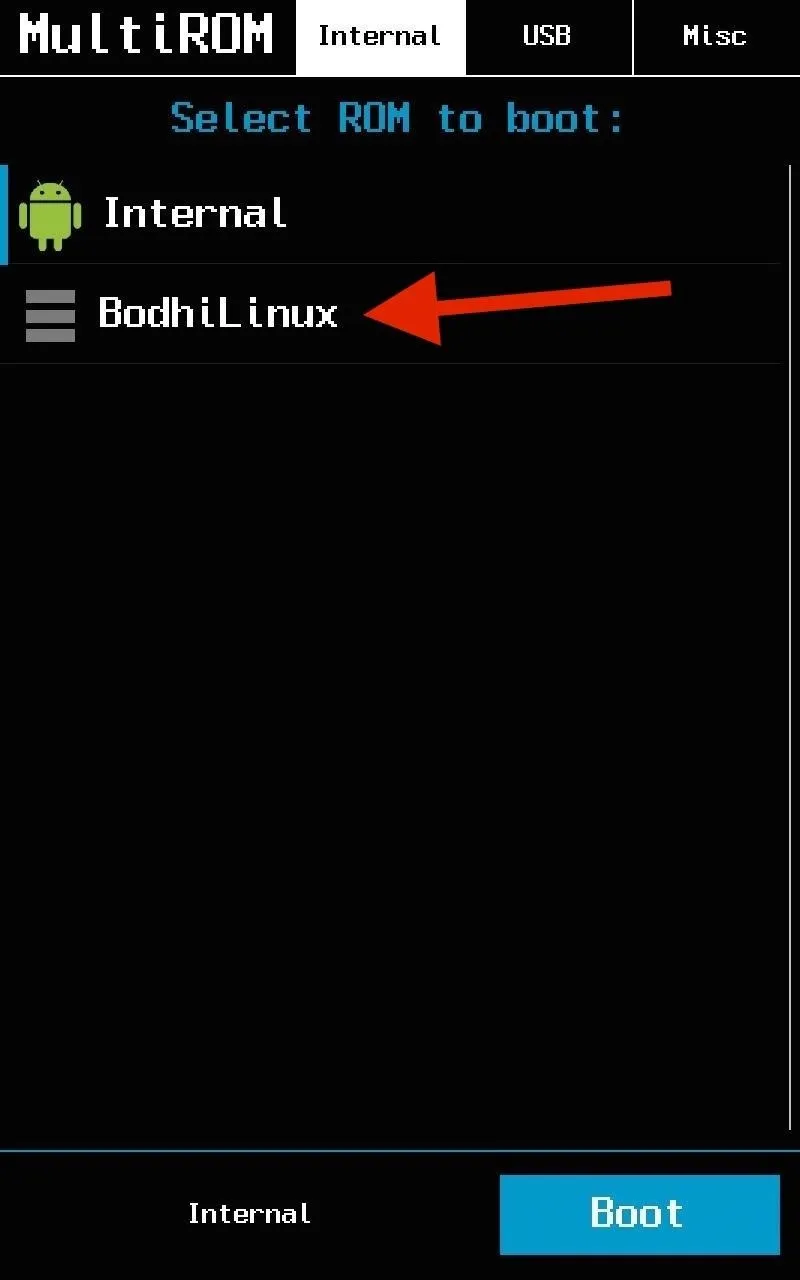
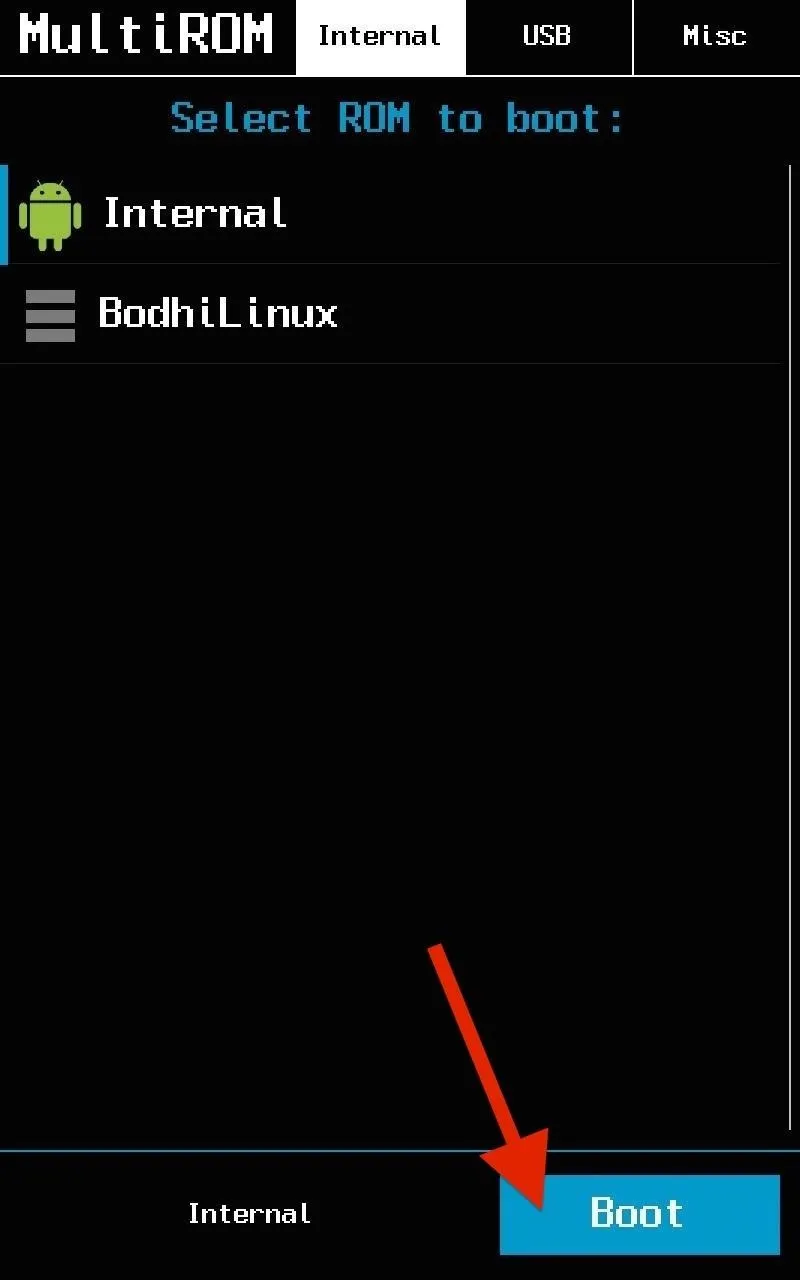
Once the installation is complete, you can reboot your device. Immediately after your device reboots, you will see the MultiROM screen telling you that it will boot the Internal ROM automatically in a few seconds, unless you select something different. Tap the screen, select BodhiLinux, and hit Boot.


Configure & Use Bodhi
Upon booting, you will find that Bodhi works much as you would expect and does not require an abundance of tweaking to be functional. Bodhi comes with a web browser (Midori), text editor (Leafpad), terminal (Terminology), and file manager (Enlightenment File Manager).
On-Screen Keyboard
Bodhi comes with an on-screen keyboard pre-installed. To toggle the keyboard, tap the two-tone blue circle icon (it looks similar to a yin-yang symbol) on the top right of the screen to the left of the battery icon.
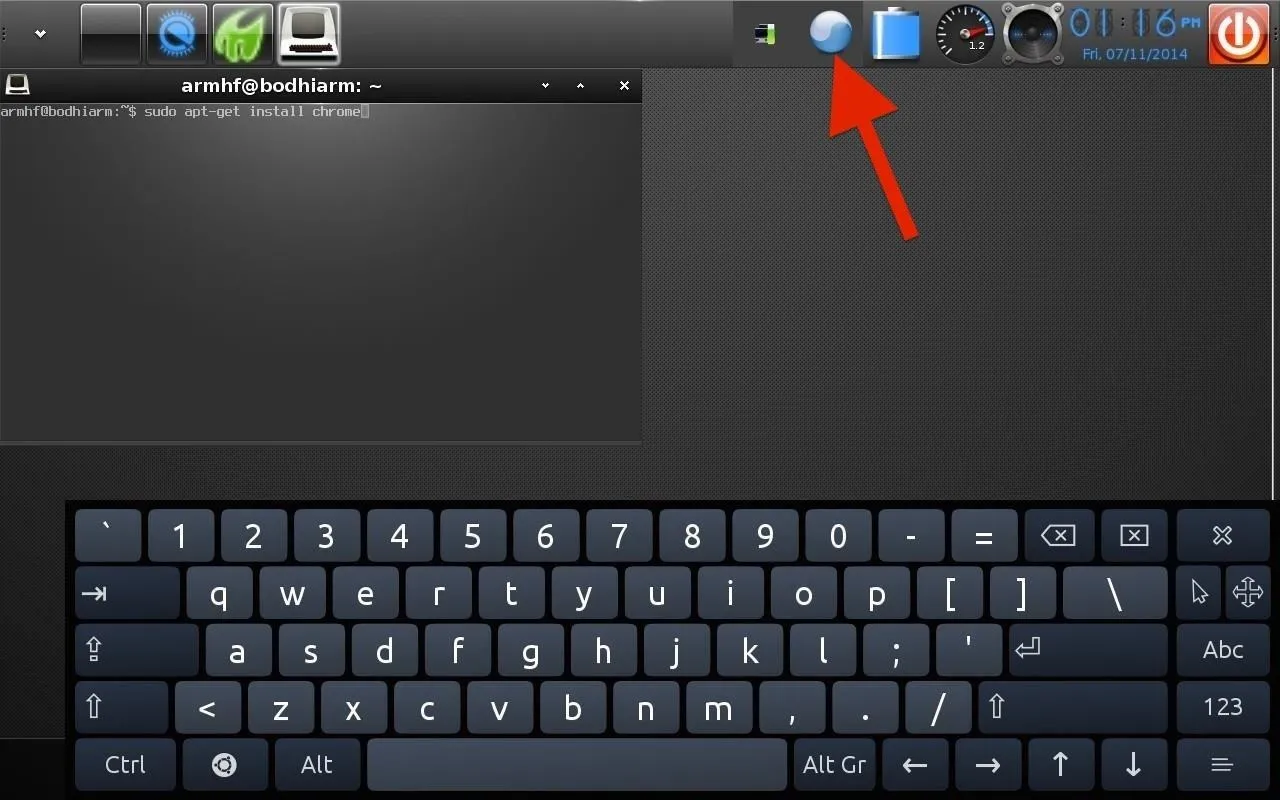
The on-screen keyboard is very functional and responsive. It can be moved around the screen and, overall, behaves exactly as an on-screen keyboard should.
Connecting to Wi-Fi
To connect to Wi-Fi, tap the green leaf button at the bottom right of the screen which will open the application drawer.
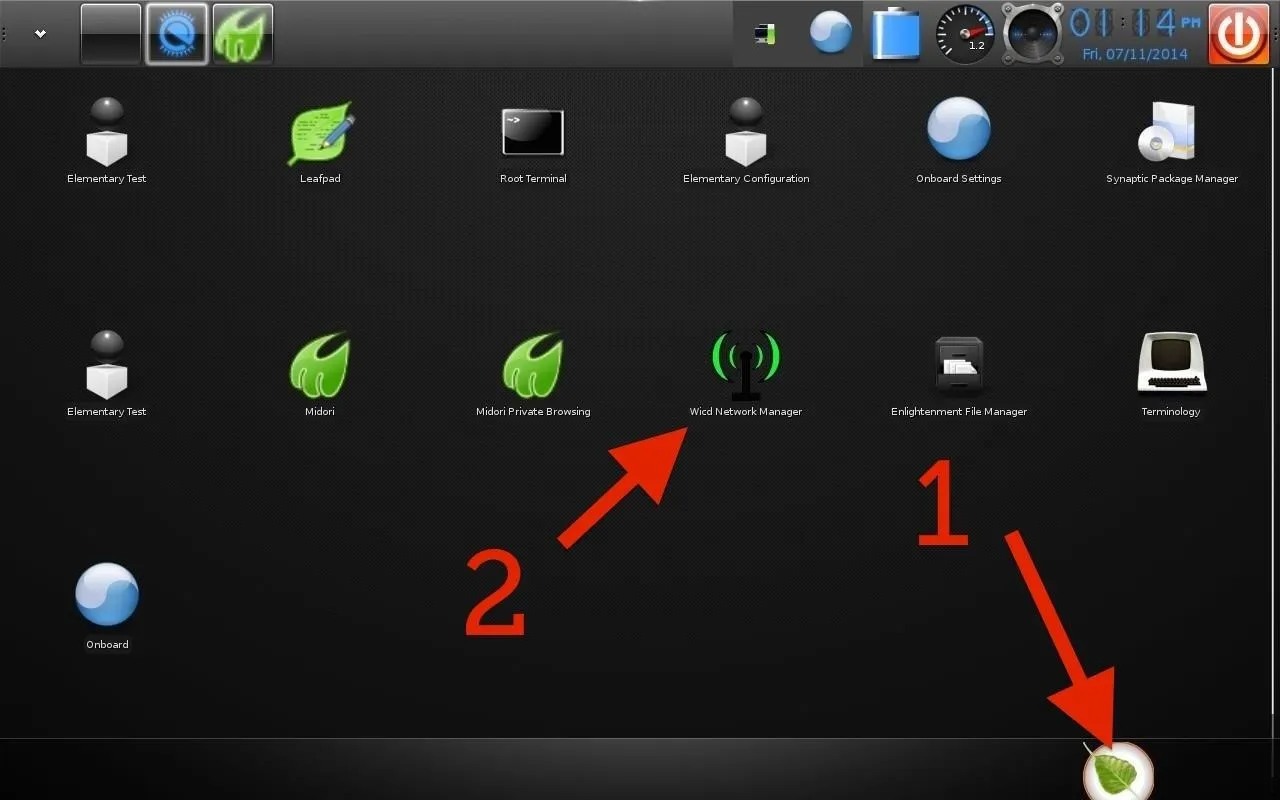
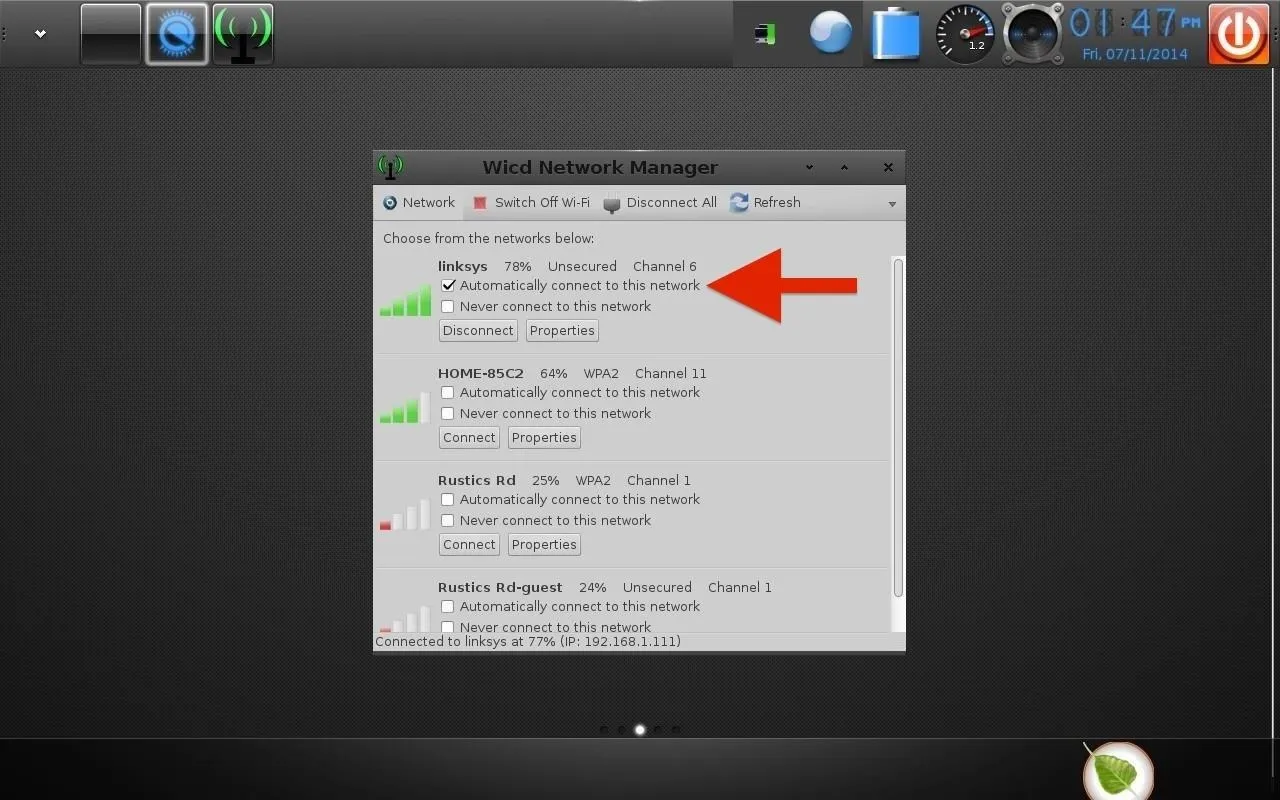
Double-tap the Wicd Network Manager to connect to your desired wireless network. Be sure to tick the Automatically connect to this network checkbox if you plan on using this network regularly.
Installing New Programs
While Bodhi does come with Synaptic Package Manager, I found it difficult to use on a touchscreen—I prefer to install programs via the command line, using apt-get.
Tap the green leaf icon on the bottom right of the screen to open the application drawer. Double-tap on Terminology to open a terminal window. In the terminal, type sudo apt-get install
For example: sudo apt-get install libreoffice
When you hit enter, you will be asked for your password, which is bodhilinux.
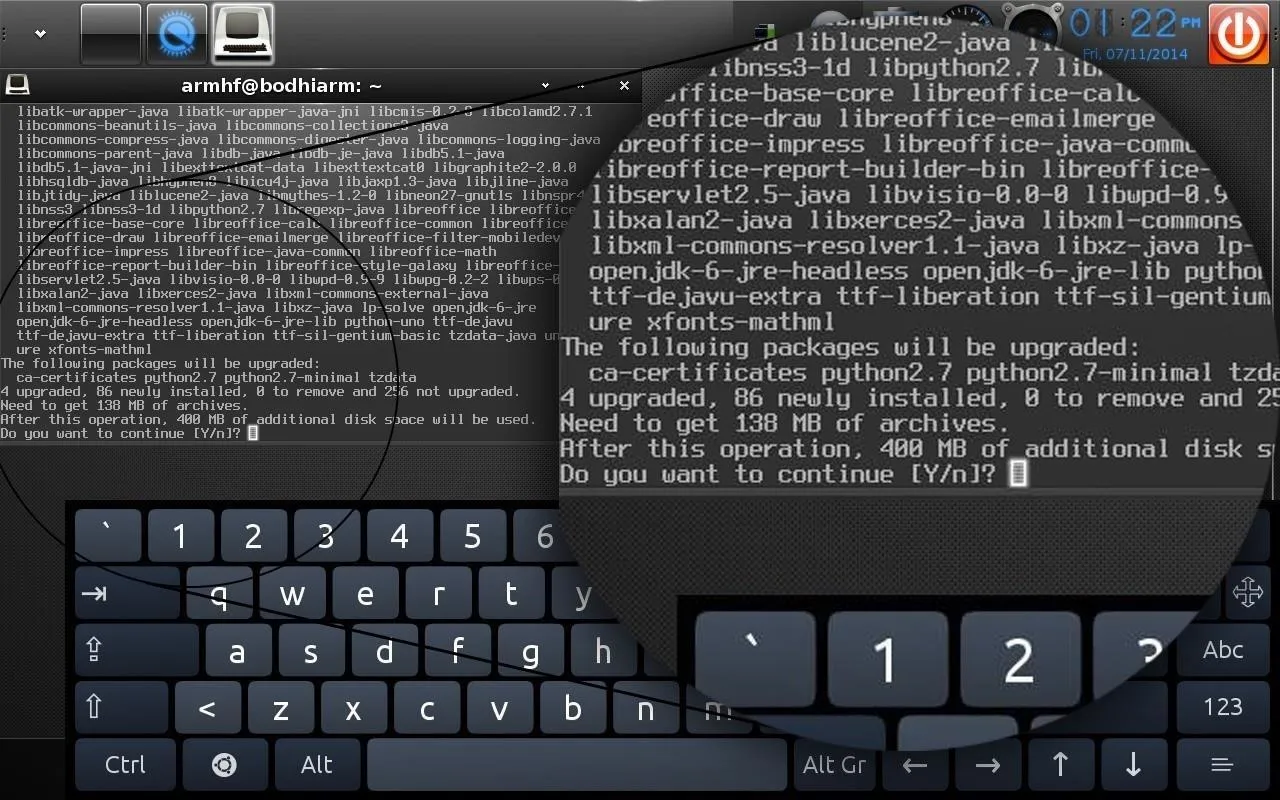
A few examples of available packages to install are LibreOffice (a free Microsoft Office suite alternative), Transmission (a BitTorrent client), VLC (a media player), and so on.
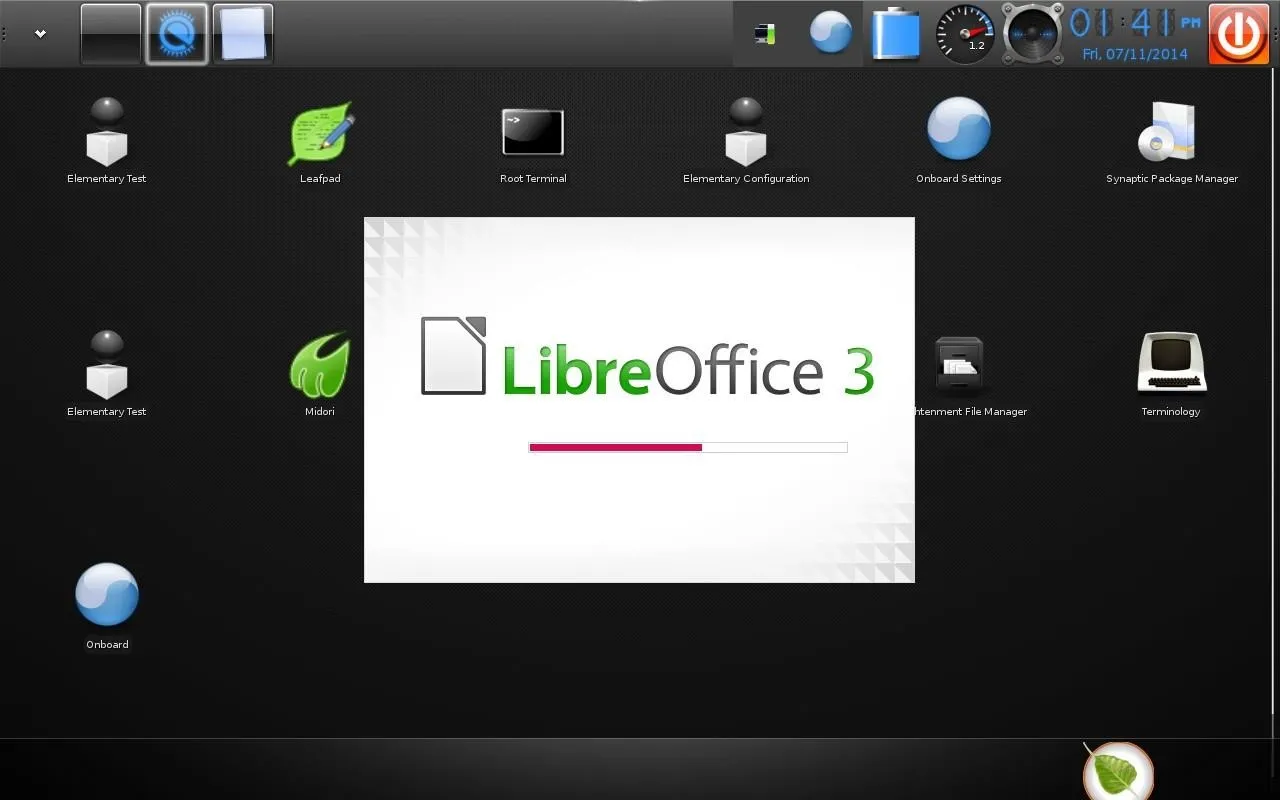
Be aware that not all Linux applications will run on your tablet, only those that are compatible with ARM architecture will work on the Nexus 7.
Final Thoughts
In my opinion, Bodhi Linux (with its Enlightenment Desktop) provides the most usable and responsive Linux experience that I have seen on the Nexus 7 tablet.
The touchscreen interface is not entirely without its frustrations, though. For example, you do occasionally need to double-tap things (which, on a tablet, feels a little bit like going back in time), the on-screen keyboard doesn't automatically appear when you need it, and it can be struggle to tap a small button (damn you, minimize!) or grab a thin scroll bar.
That said, I found Bodhi to be a very slick and capable OS, one that I can see myself actually using in the future.


Comments
Be the first, drop a comment!