


![Mr.Shield [2-PACK] Designed For Asus (Google) Nexus 7 FHD (2nd Generation) 2013 Tablet [Tempered Glass] Screen Protector with Lifetime Replacement](https://m.media-amazon.com/images/I/71ik6S-liFL._AC_UY218_.jpg)

Something went wrong and your Nexus 7 is freaking out on you. Maybe you flashed a bad ROM or ZIP file, or maybe it's just bugging, and it's time to restore your tablet back to a working condition. Thankfully, you've already made a backup of your Nexus 7!
Note: If you don't have a back up, don't worry! I've still got you covered. Just scroll down to the Restoring to Factory Stock section below, and be sure to back upbefore you start messing around with other ROMs next time!
Whether you just need to restore your tablet with an Android OS backup made with TWRP, or need to go even further and take your Nexus 7 back to factory settings, I'll show you how. Let's begin!
Restoring Your Nexus 7 with TWRP
You'll need a custom recovery for this.
If you don't have one or know what TWRP or a custom recovery is, head over to my definitive guide to soft-modding your Nexus 7 to get started. It's a must read for any Nexus 7 user.
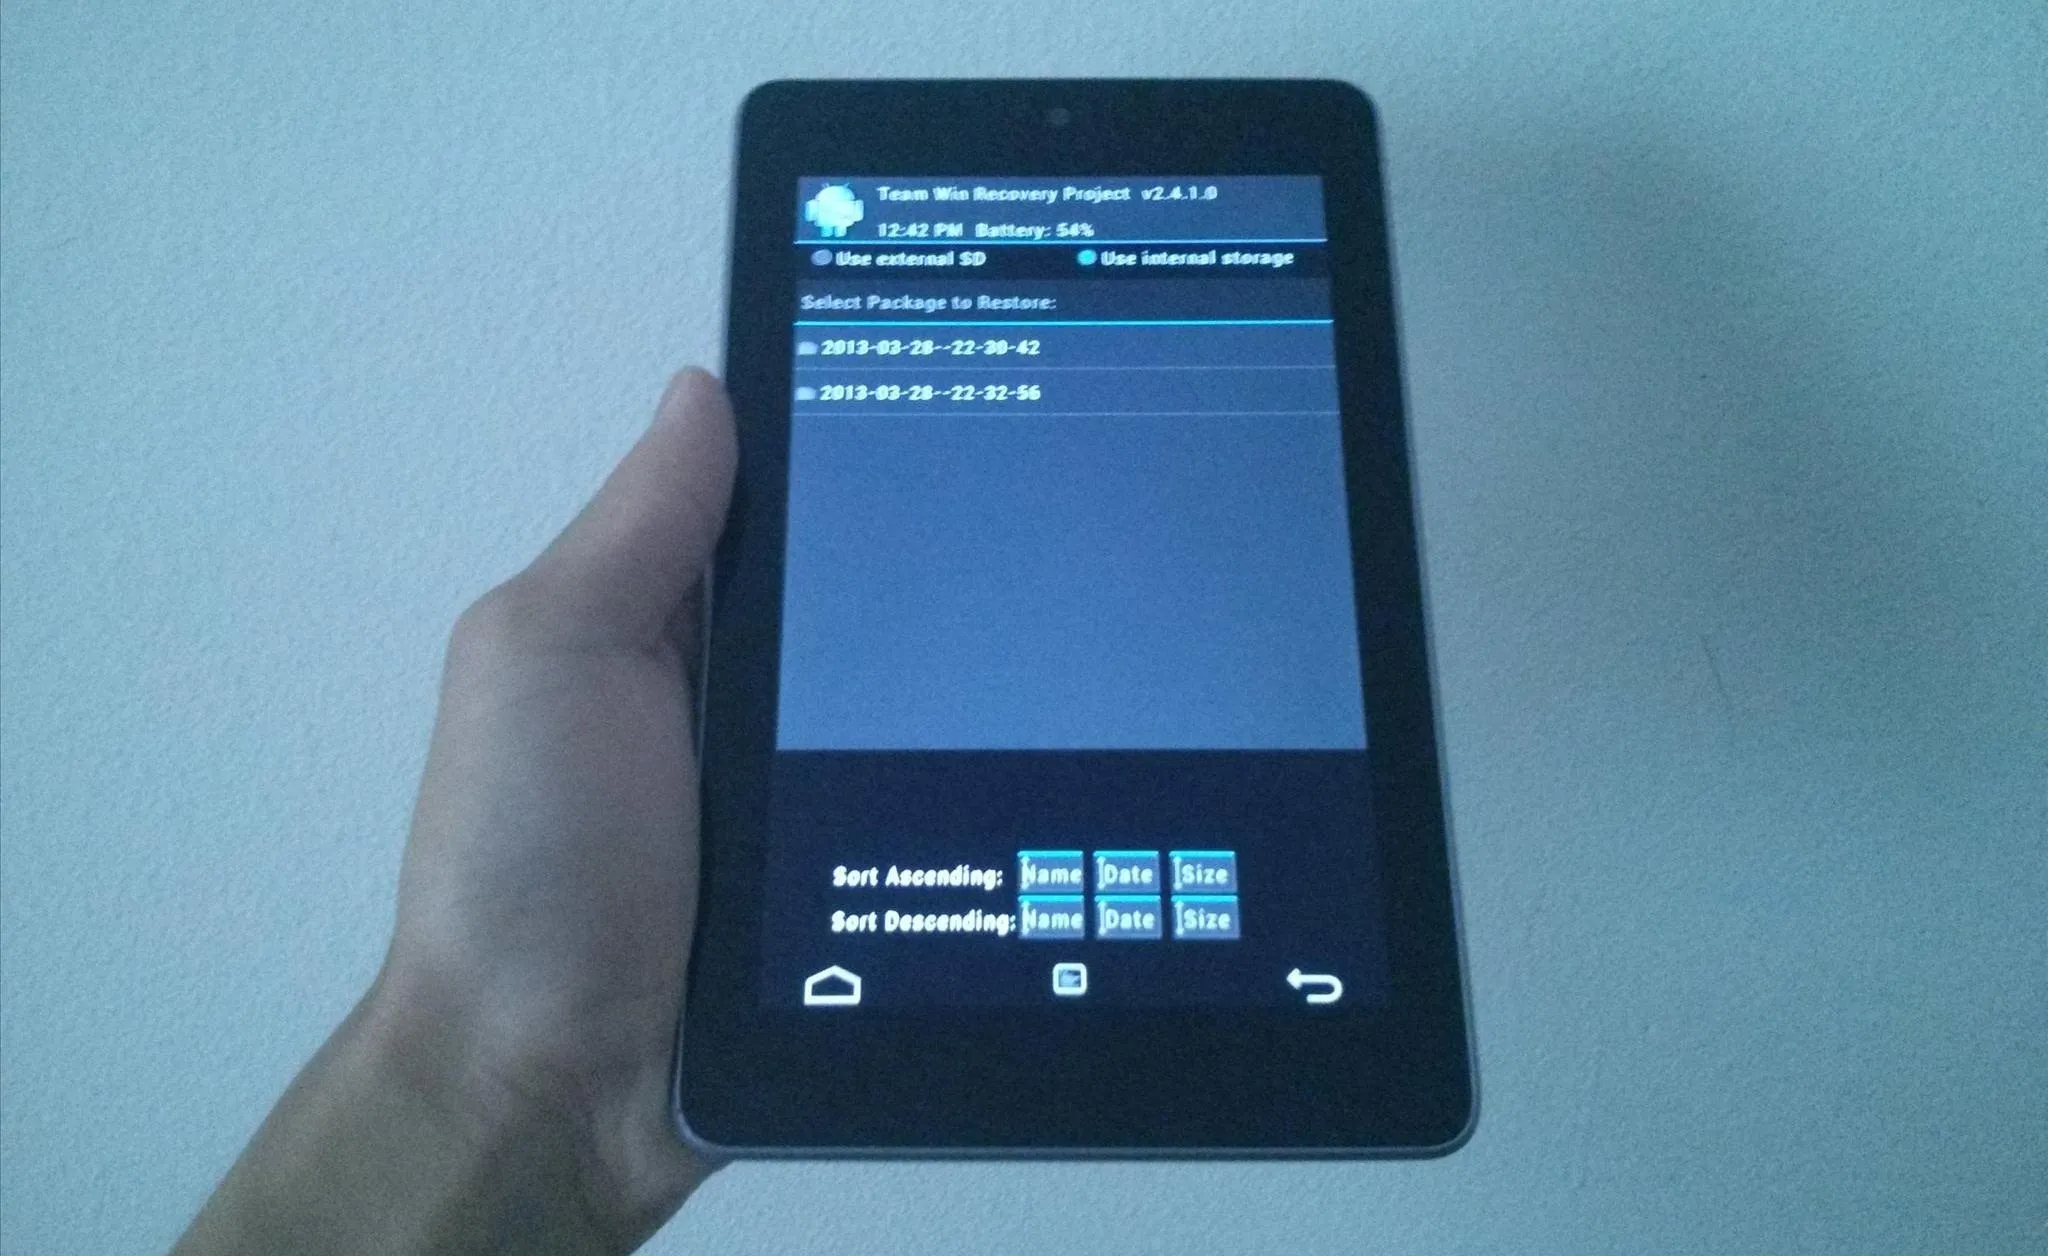
Begin by powering off your device, then press and hold both the power and volume down button to boot into TWRP.
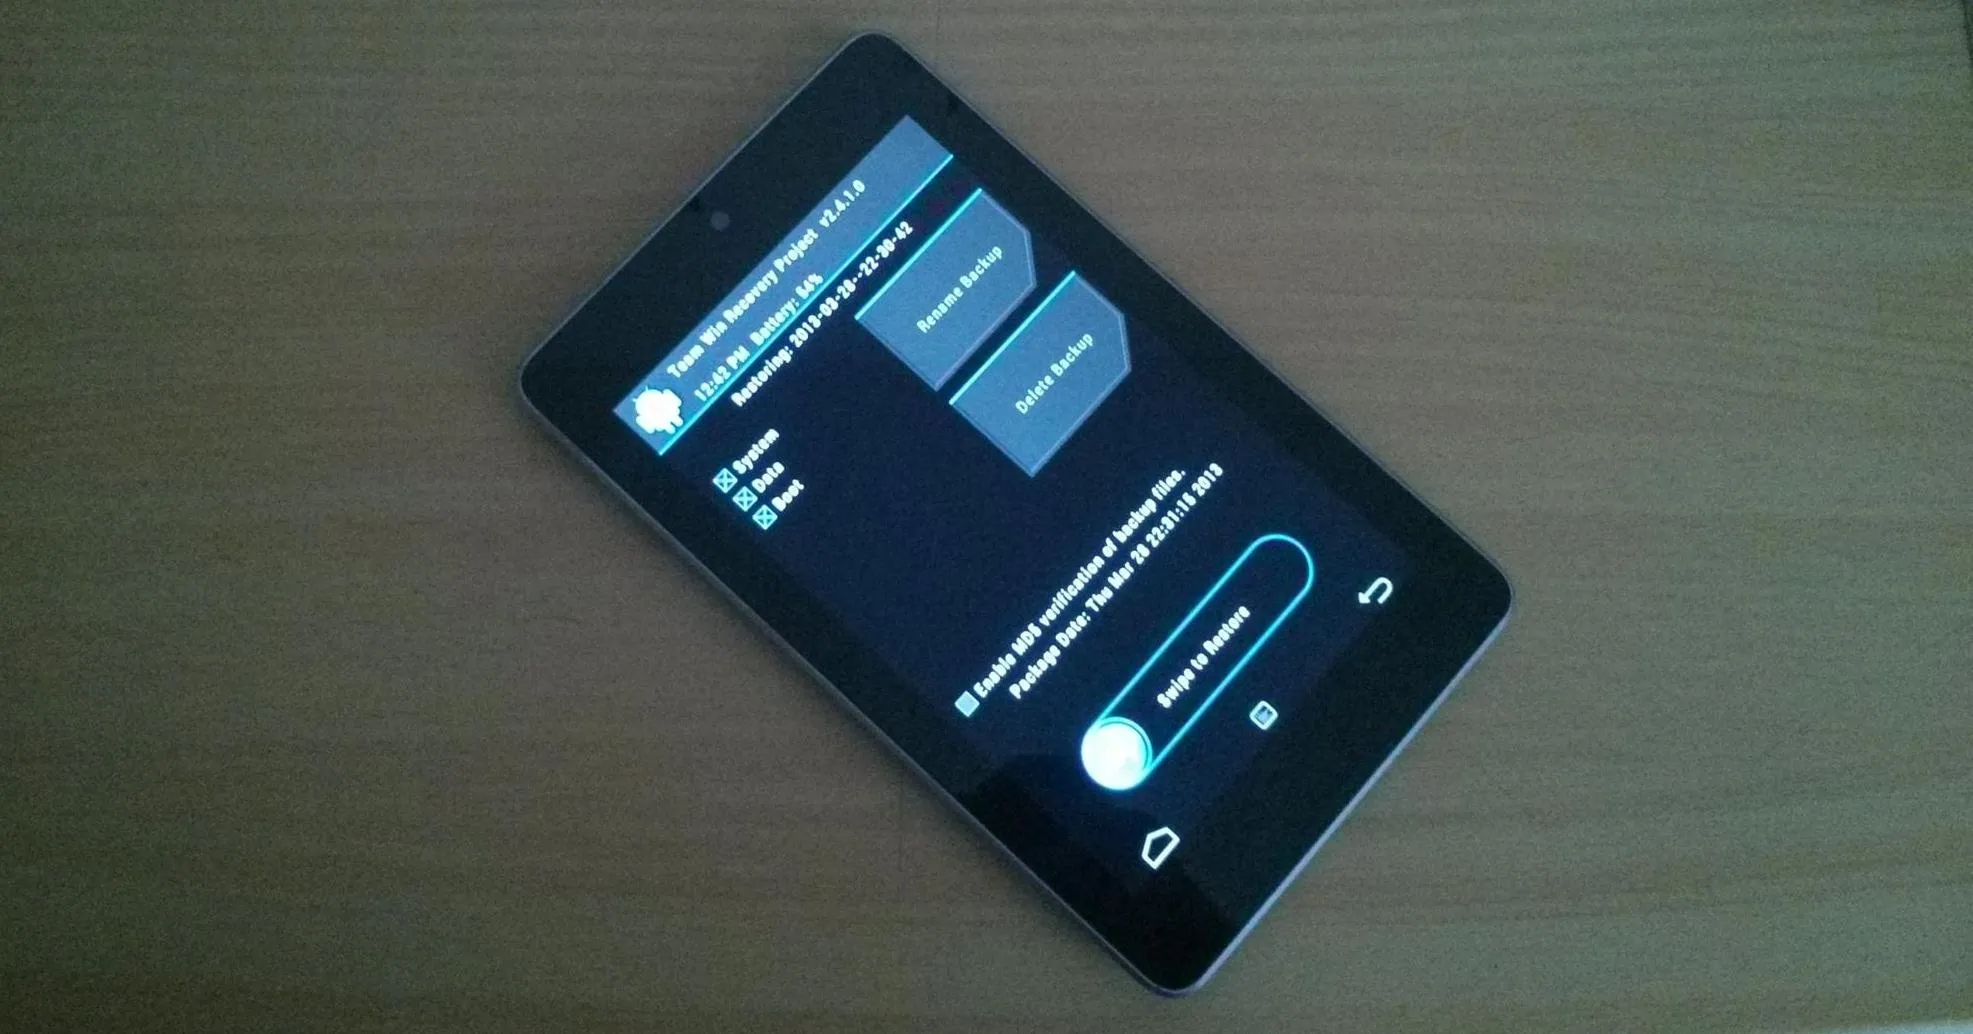
Tap on Restore, then choose your restore package that you made when backing up.
Then just Swipe to Restore.
That's it! Your Nexus 7 will restore to the last time you made that backup!
Restoring Your Apps
This does not require root or a custom recovery.
Download and install App Backup and Restore (free) from Google Play onto your device. Launch it and tap Archived. Check the apps you want restored and tap Restore at the bottom.
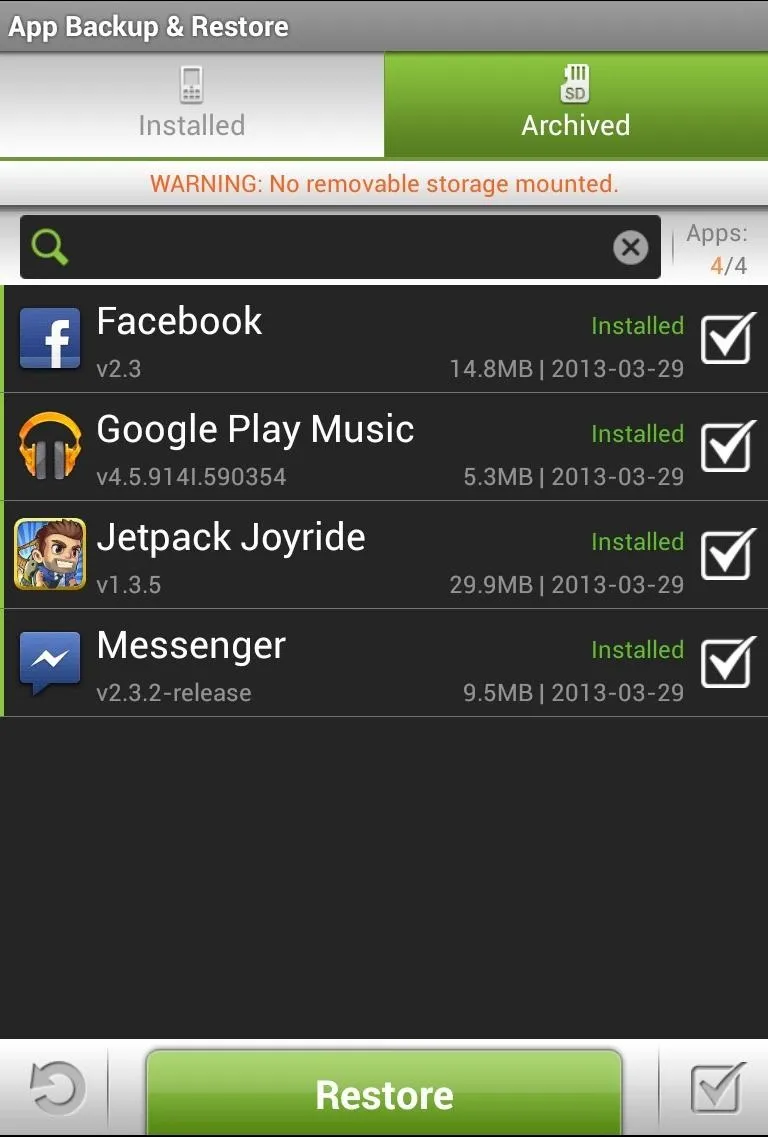
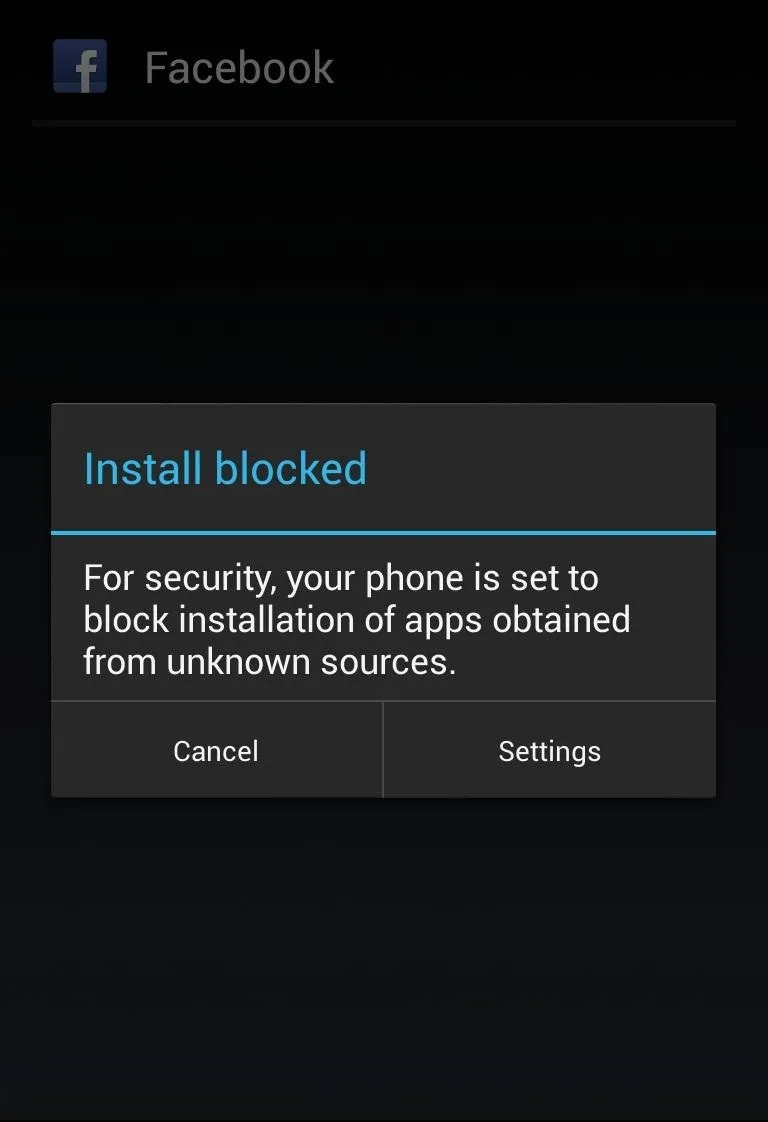
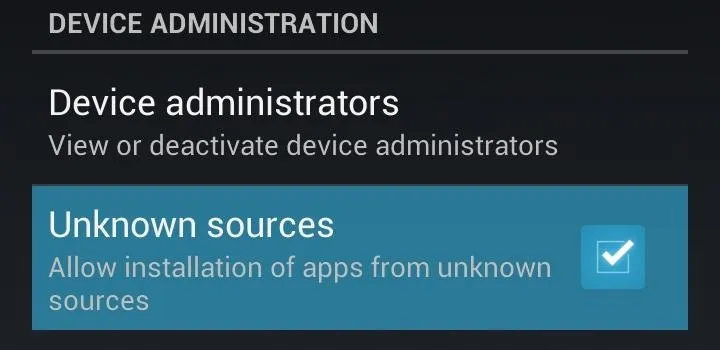
If the install is blocked, enable Unknown Sources in Settings -> Security.
That's it! Your apps will then restore back to your Nexus 7!
Restoring to Factory Stock with Toolkit
If you need some serious fixing, it's probably best to go back to the factory settings. Maybe you're just tired of custom ROMs. Well, here's how to restore your Nexus 7 to its out-of-the-box state—no mods, no hacks, no tweaks.
On your PC, begin by downloading the Nexus 7 Root Toolkit. Install the toolkit by clicking "Next" through the various prompts.
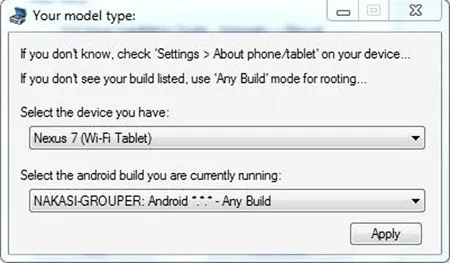
Once the installation is complete, go ahead and run the toolkit. A window will pop up asking for your device model. Choose your device from the list along with its OS version and click "Apply".
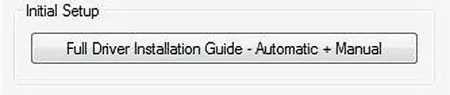
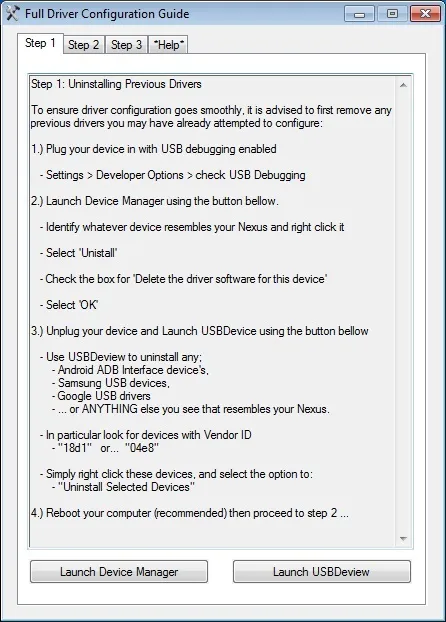
Head over to "Initial Setup" and click "Full Driver Installation..."
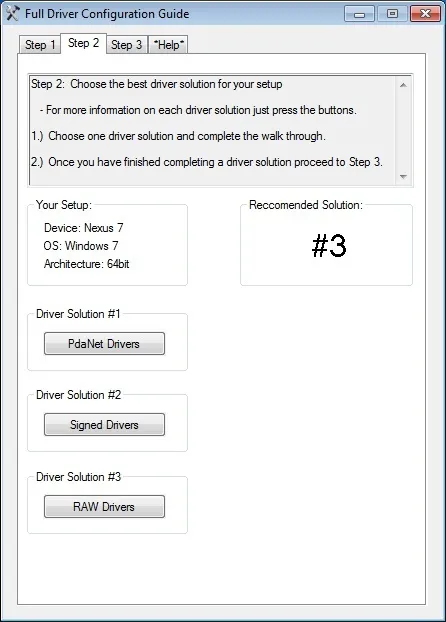
Follow the guide provided in the toolkit to install the required drivers for your Nexus 7. I recommend "Driver Solution #3", but any of the three options should work. The toolkit has a built-in guide with pictures that will aid you in installing the drivers.
Now with the drivers installed, make sure they're working by testing them over in the "Step 3" tab. The toolkit will verify if the drivers are properly installed and working.
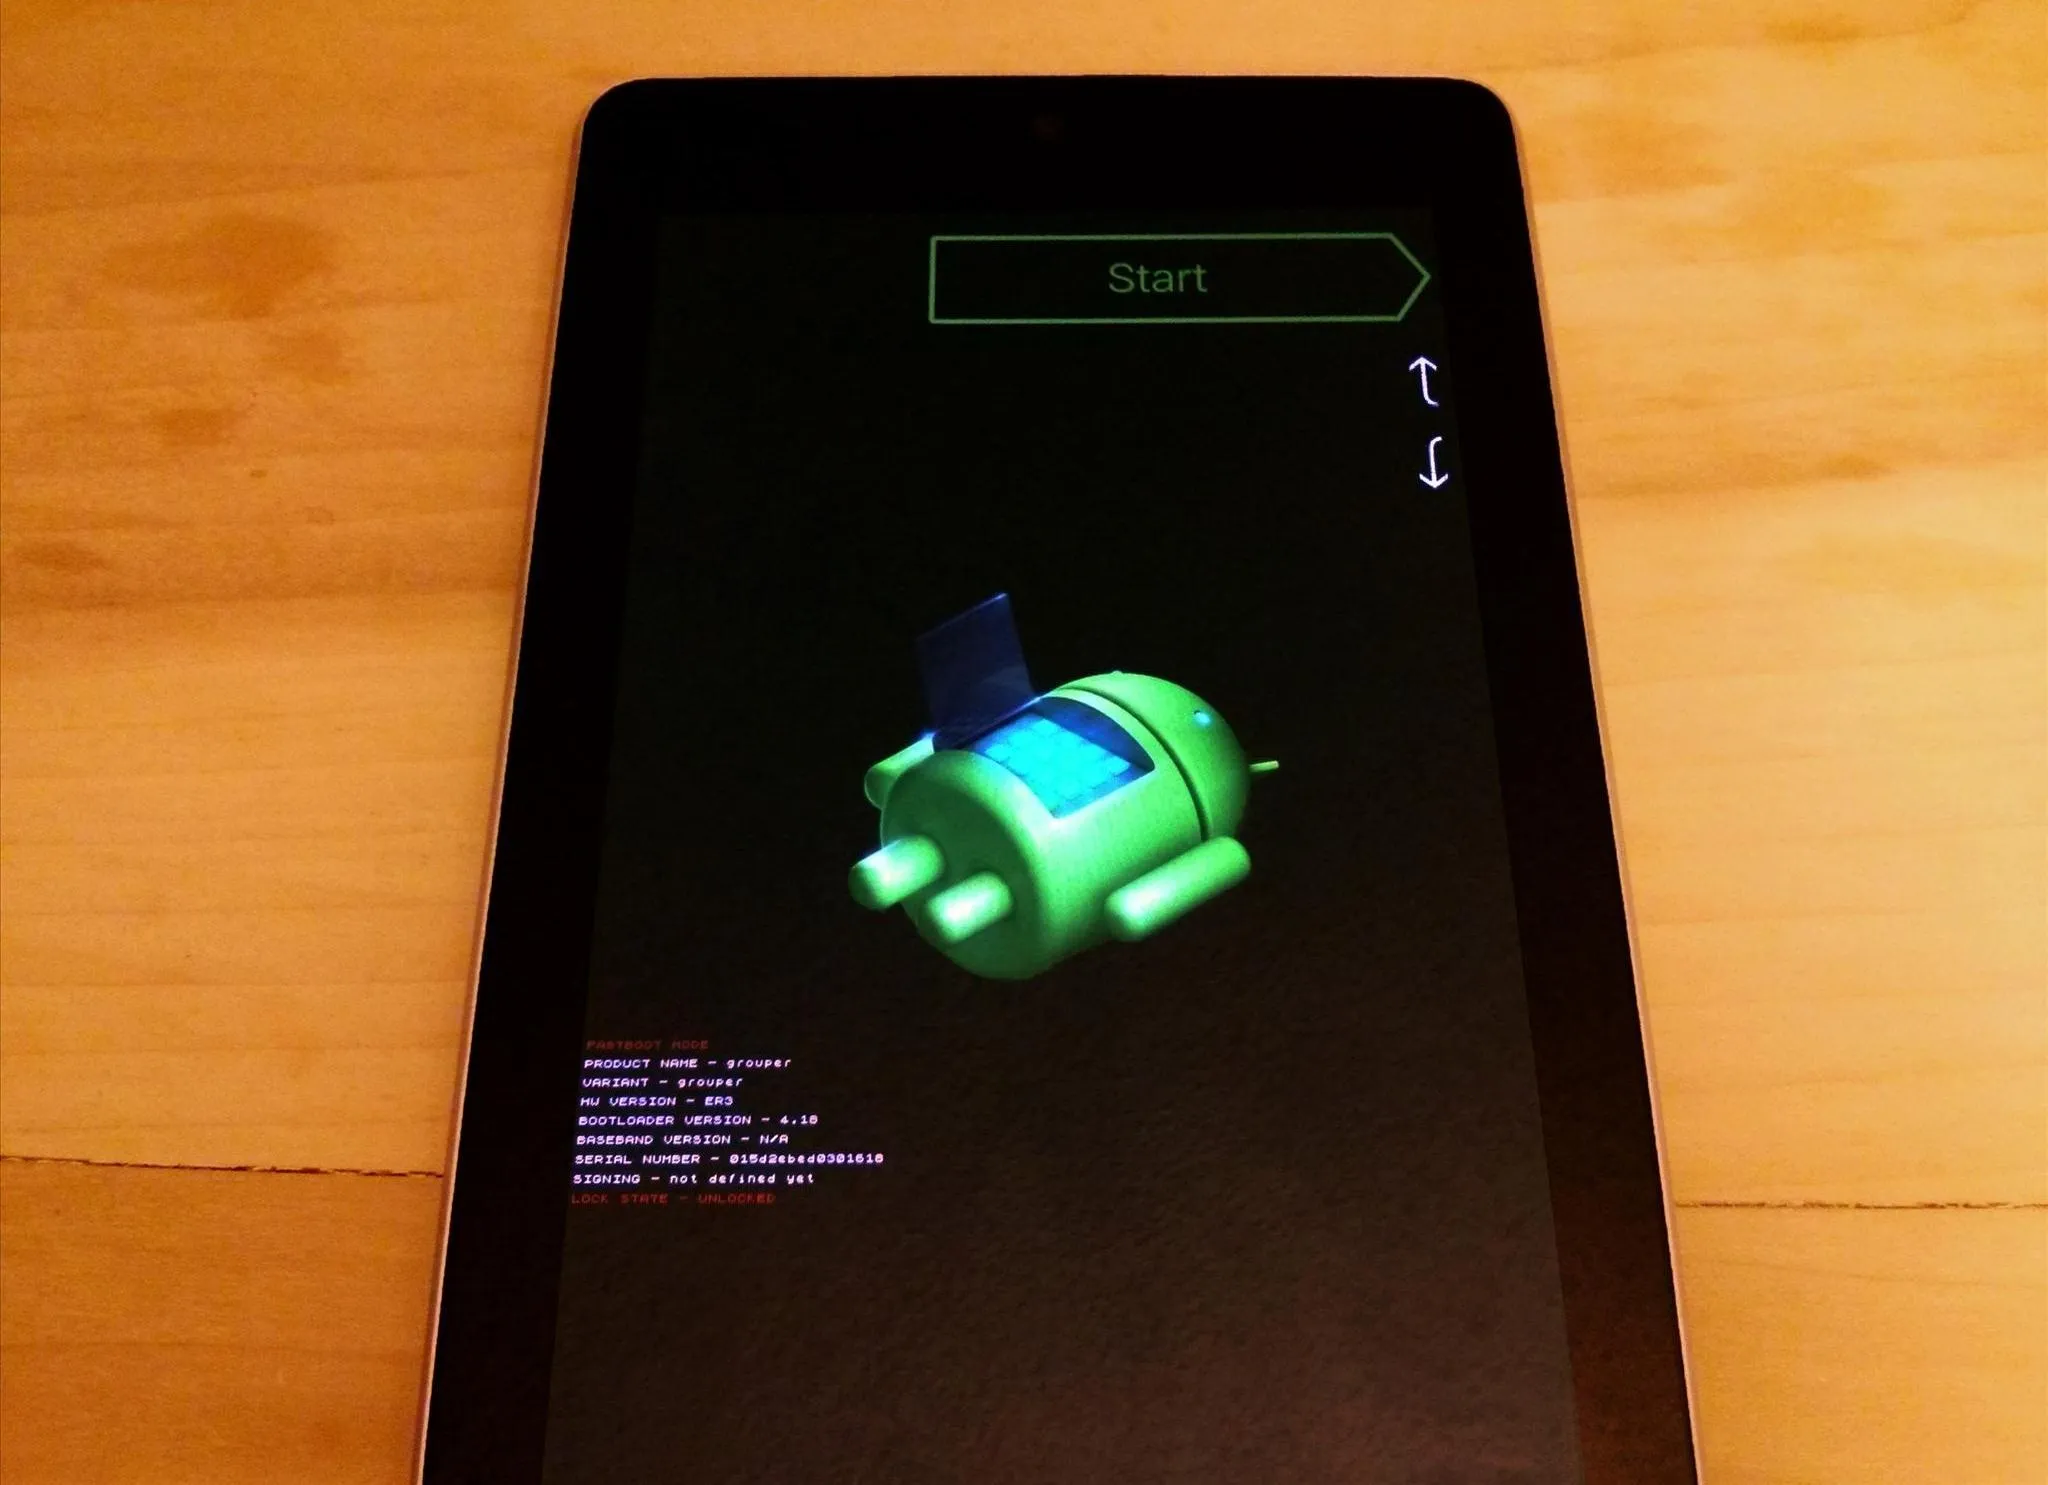
Boot into fastboot mode by powering off your Nexus 7, then press and hold both the power and volume down buttons. Plug in your Nexus 7 to your PC with the USB cable.
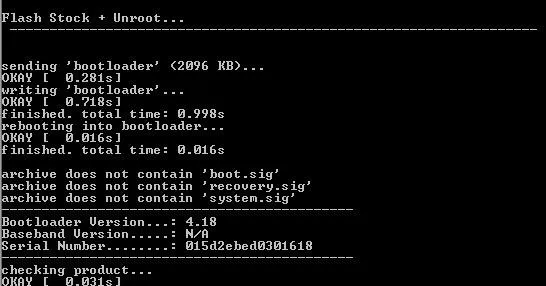
On your PC, click "Flash Stock + Unroot" in the toolkit. The toolkit will download the factory Android OS your Nexus 7 shipped with.


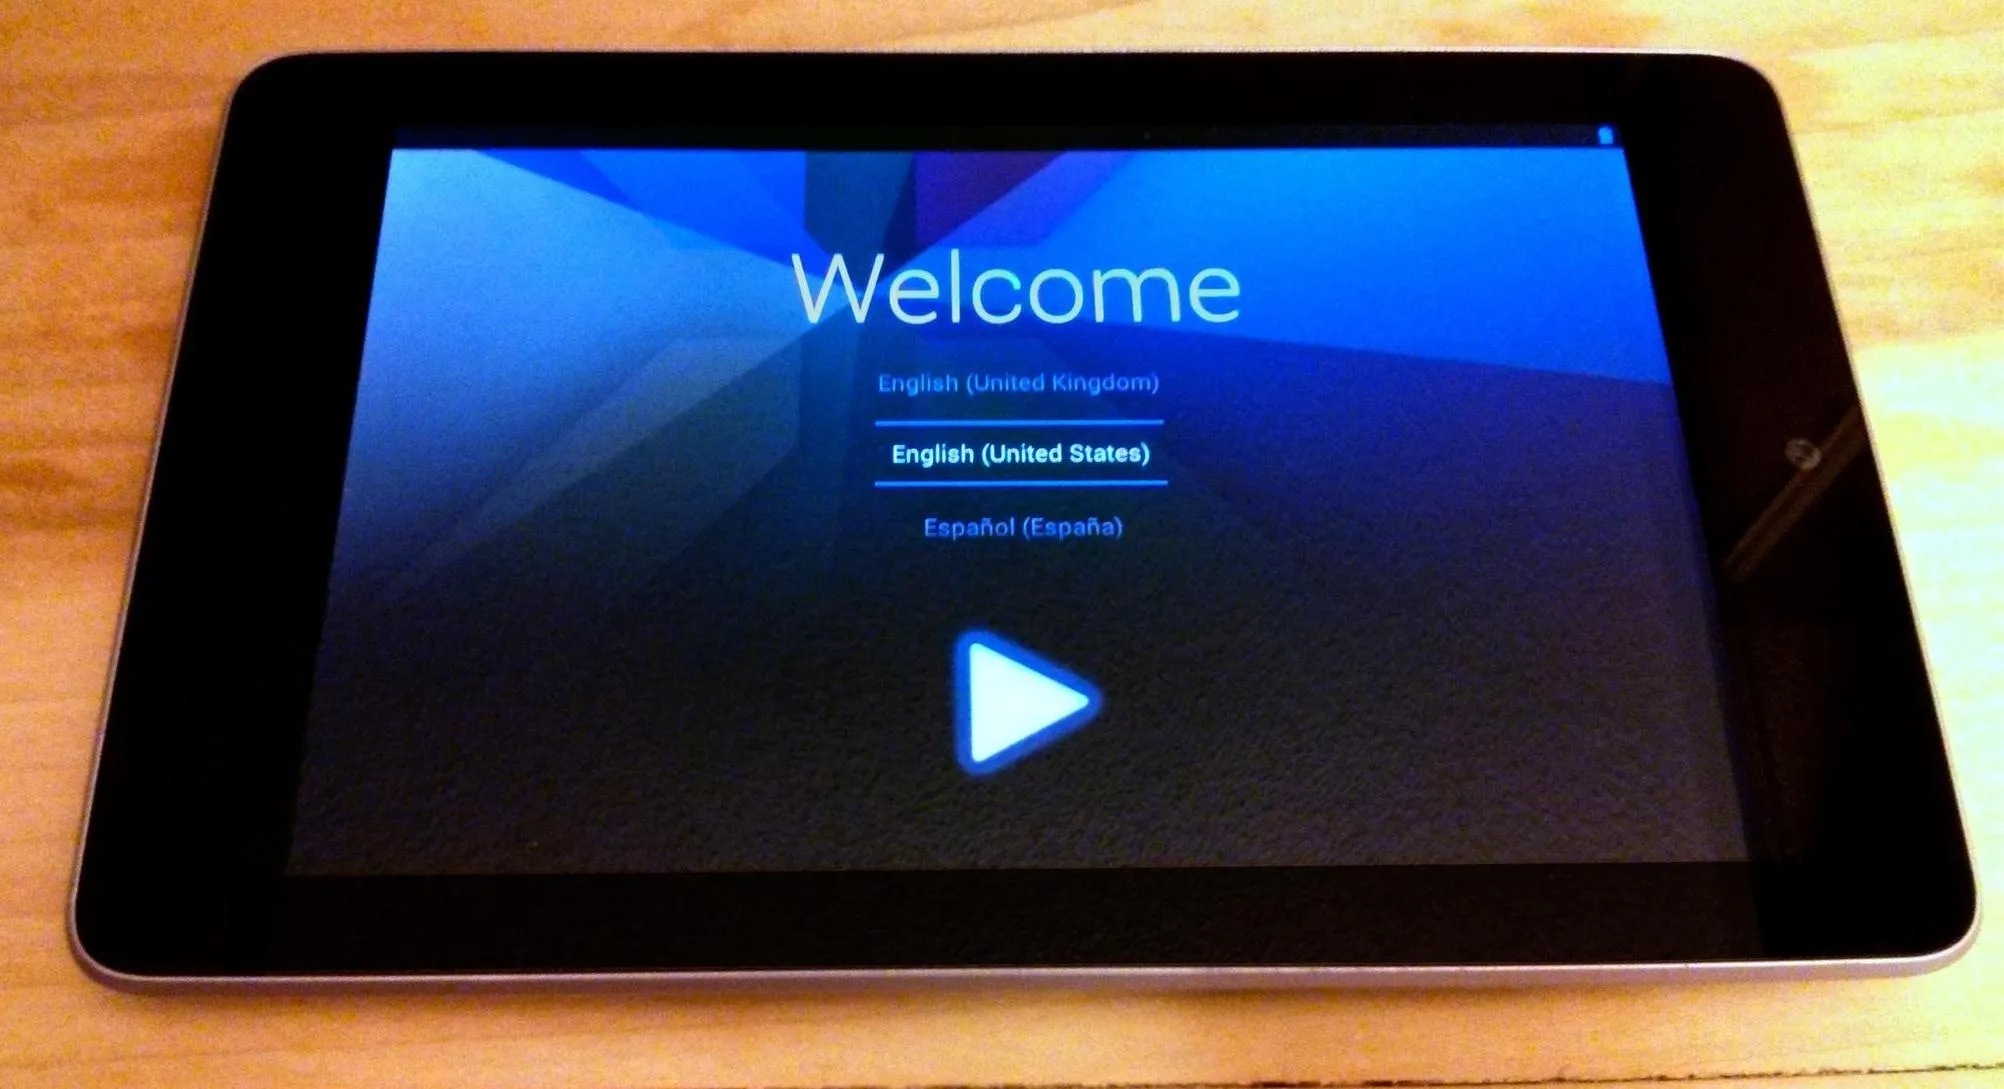
The rest will be automated by the toolkit. Here it is flashing the factory OS and then rebooting your device all fully restored.
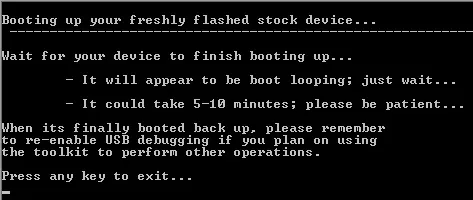
Your Nexus 7 tablet all restored! You can now unplug it from your PC. SUCCESS!
Tell us if it worked for you!


Comments
Be the first, drop a comment!